Changing the spark plugs on a 2002-2003 Maxima is not something you should have to do until around 100,000 miles. The stock plugs are platinum tipped and should last a very long time. Replacement of the plugs is something that Nissan recommends you "see your dealer" to do. The reason is that in order to replace the 3 plugs in the rear cylinder bank, the intake manifold upper and lower collectors have to be completely removed from the vehicle. To do this requires skill beyond the average Sunday mechanic, since there are many vacuum, electrical and coolant lines that have to come off in order to perform the job.
My Nissan had slightly over 18,000 miles on it when I did the job, and it did not really need new plugs. The reason I ended up doing this job was because I strongly suspected one or more of my ignition coils were faulty, and try as I might I could not get Nissan to admit the problem or come up with a solution. I called Courtesy Nissan, ordered a set of ignition coils and plugs, and set about doing the job myself. I replaced all 6 ignition coils, and doing the spark plugs as well was simply for the sake of completeness.
I documented the entire process with pictures and text so that if there is anyone out there who wants to do the same, perhaps they will not be quite as intimidated as if they were going in cold. The job is not simple, and took me about 3.5 hours, but I did take a lunch break, and was also documenting the process with a digital camera.
Cost of the job was also not cheap - a set of 6 ignition coils from Courtesy Nissan cost me $333.48. The required gasket is another $18.40. The plugs themselves will run you $11.00 each. If all you really need to do is change your plugs, obviously you don't need to buy coils, so then all you would need would be 6 plugs and the gasket. Do the job yourself and you will save quite a fortune in labor, as this job performed by the dealer would be many hundreds of dollars. |
 |
| 1 |
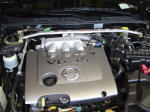
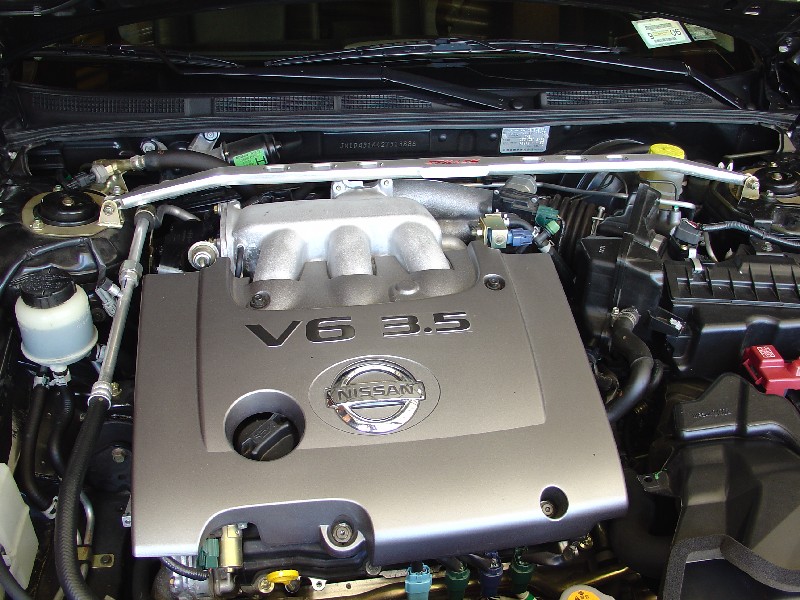
| Here is the nice clean engine bay before going in with the chainsaw. If you have a front strut brace, as I did, it is probably not necessary to remove it, but I did simply to make it a little easier to lift the collector out. It only takes a minute or two anyway. |
 |
| 1 |
| This pic still shows the strut brace in place (I removed it later). First step is to remove the 4 allen bolts securing the engine cover, and take it off. |
 |
| 3 |
| A view near the firewall. The test is if you can reach and loosen these two bolts then you can do the rest of the job. It requires a 12mm socket with a long handle. |
 |
| 4 |
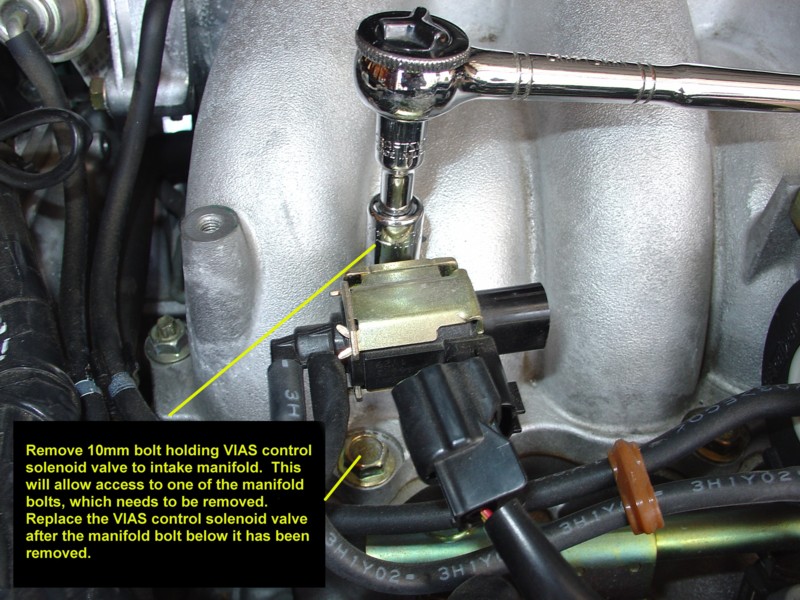
| My method of doing this job will show you how it can be done without disconnecting so many vacuum lines, as I have seen others do. All you need to do is take a few parts off first so you can reach the bolts that attach the collector to the engine. Leave the electrical connector off, but put the valve back on. |
 |
| 5 |
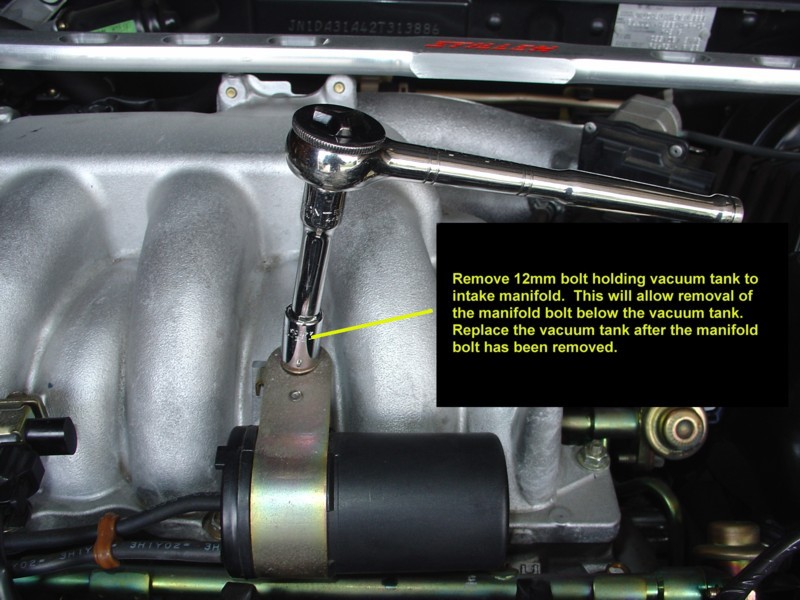
| Same idea with the vacuum tank. Take it off only so you can reach the attachment bolts. Then put it, and the VIAS control solenoid valve back on. |
 |
| 6 |
| Once you get these 3 bolts, and 2 nuts off, you can go ahead and put the VIAS and vacuum tanks back on the collector. |
 |
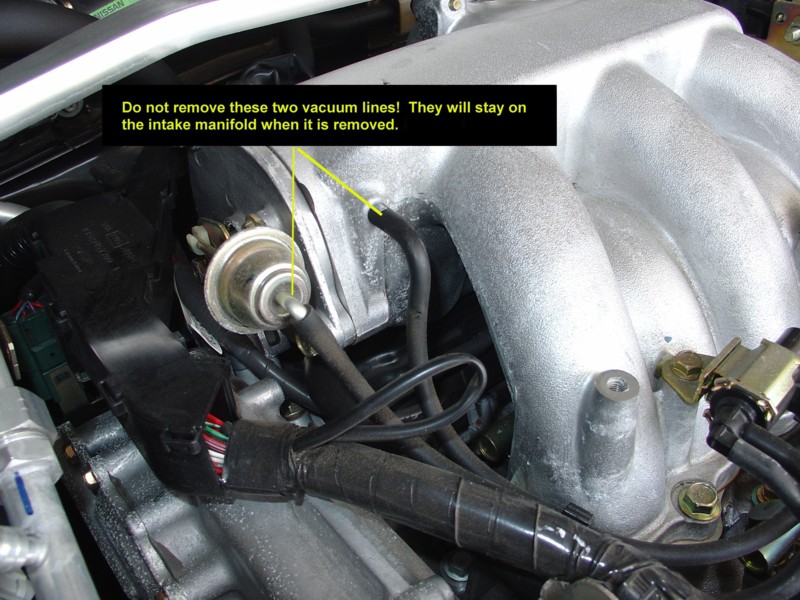
| 7 |
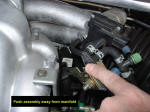
| Don't take these off! No need to. You'll see why later. |
 |
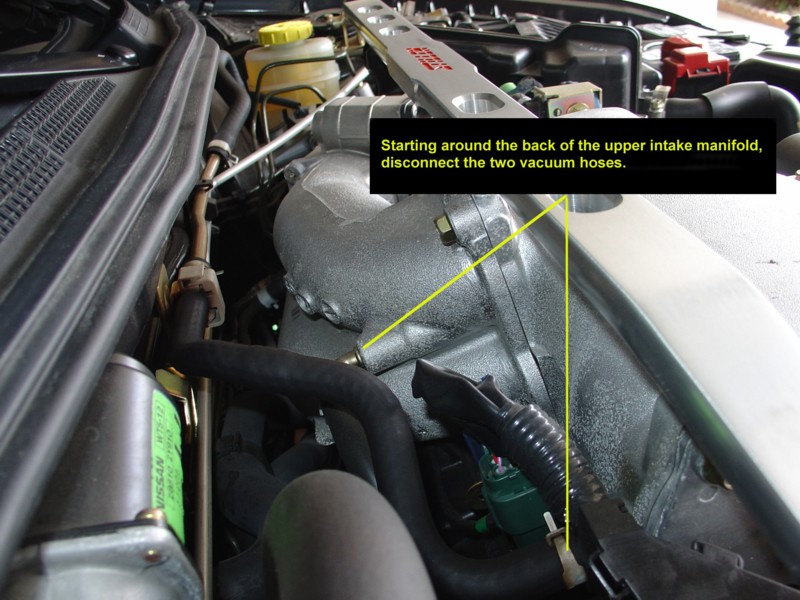
| 8 |
| Two vacuum lines which need to come off. Slide the compression clamp down, and twist the hose off. Easy. |
 |
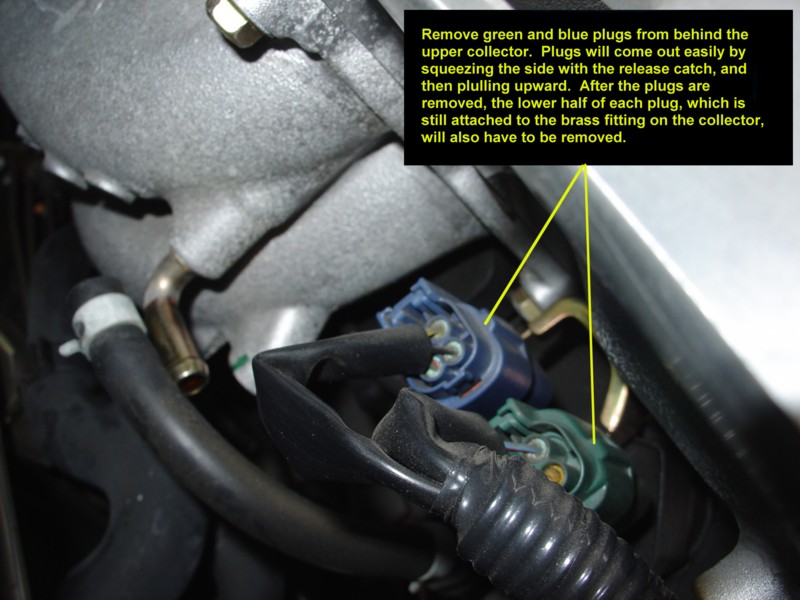
| 9 |
| These electrical connectors need to be popped off. Be careful you don't break them. |
 |
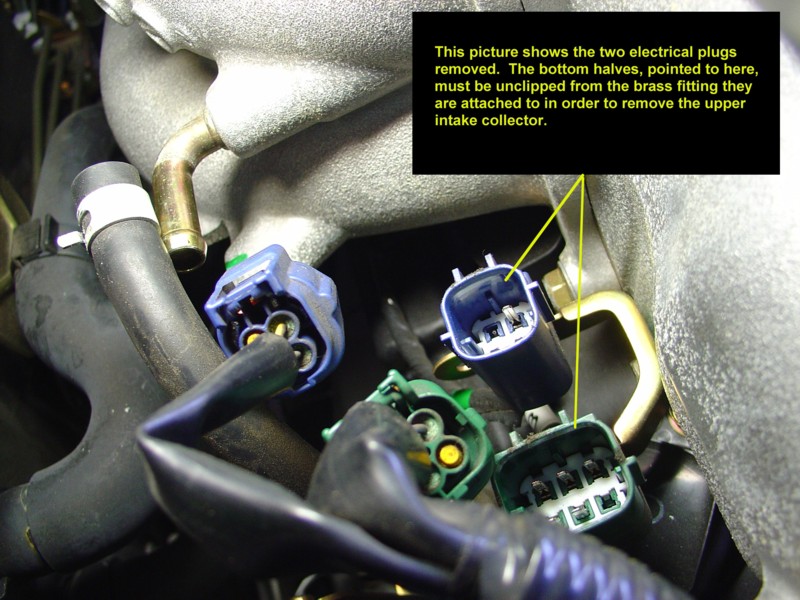
| 10 |
| You also have to release and then slide the lower half off their brass fitting, or you won't be able to lift the collector assembly off. |
 |
| 11 |
| Again, another picture before going in with the chainsaw. |
 |
| 12 |
| Loosen the screw holding the rubber connector to the intake. Leave the other side alone. It will stay. |
 |
| 13 |
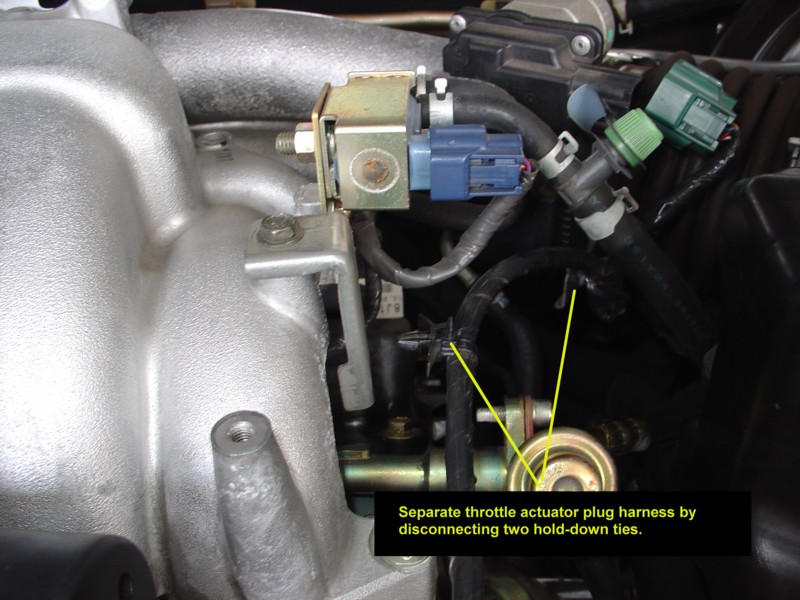
| Unplug your "drive by wire" electrical connector, for the electronic throttle. |
 |
| 14 |
| Pop out the two plastic harness holders. |
 |
| 15 |
| Get the wire out of the way. |
 |
| 16 |
| Remove this plug, take the 10mm bolt out, then put the plug back in. |
 |
| 17 |
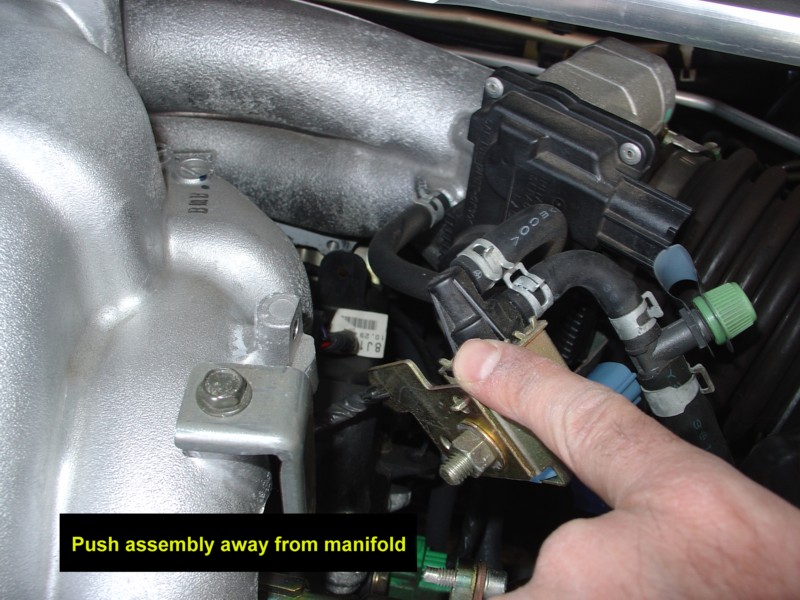
| Make room..... |
 |
| 18 |
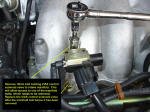
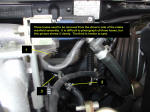
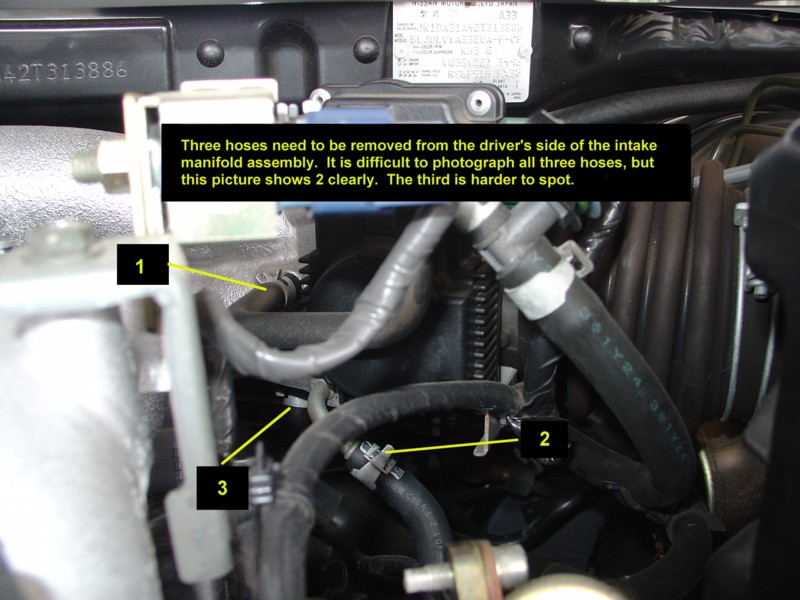
| This was a tough picture to take. A little trick here - disconnect hoses 1 and 2 right at the area pointed to by the yellow line. Be prepared for a little bit of coolant to spill out when you disconnect hose #2.
Important - disconnect hose #3, not where you see the yellow line here, but at the other end of the hose. You will never in a million years reach this hose where the arrow is pointing, but you can reach it at the other end.
Slide the compression clamps down before you try to take these hoses off. |
 |
| 19 |
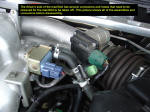
| Just another view at lines #1 and #2. |
 |
| 20 |
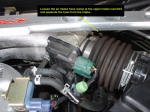
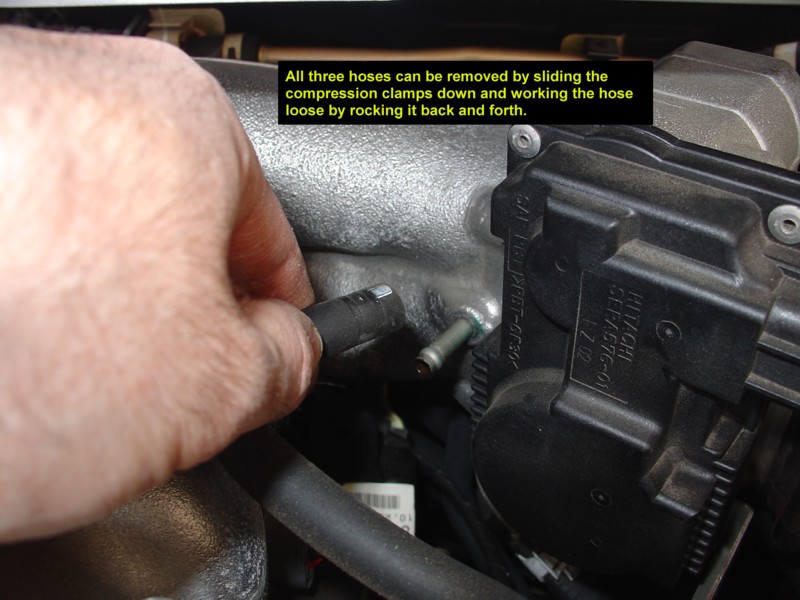
| Removing hose #1. |
 |
| 21 |
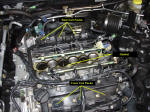
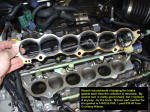
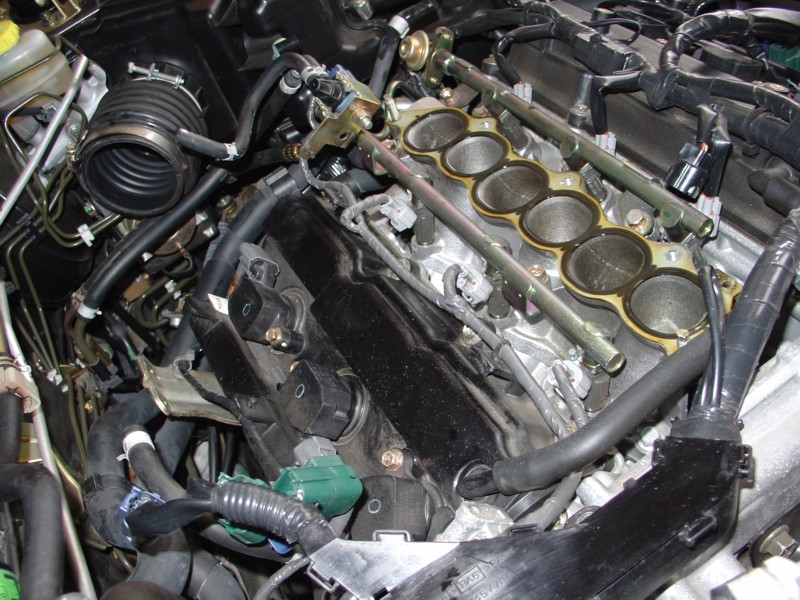
| After all of the hoses and electrical connectors come off, you can lift the entire intake collector assembly up and out. This is what the engine bay looks like with the collector assembly off. |
 |
| 22 |
| Another view of the engine bay. |
 |
| 23 |
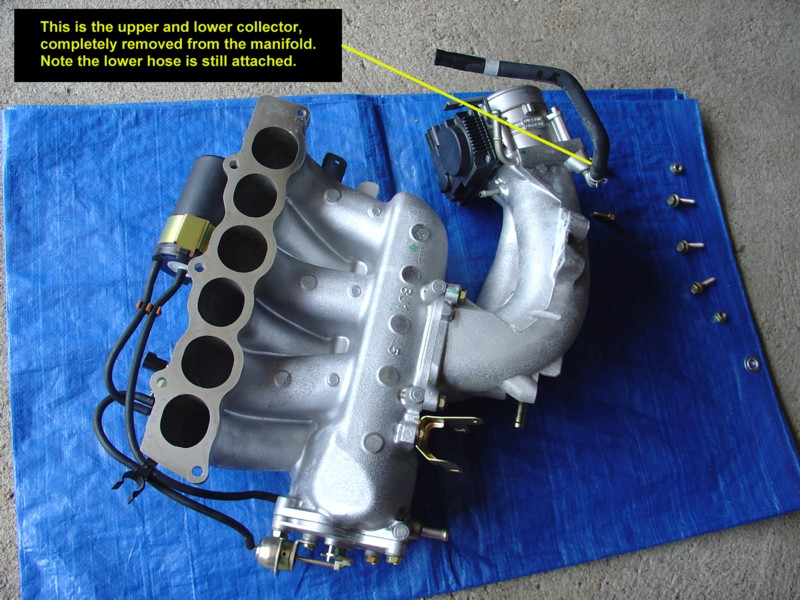
| The collector assembly is rather large, but it is actually very light. I took the opportunity to clean mine up with some Gumout intake cleaner. Note that hose #3 is still attached to the collector! |
 |
| 24 |
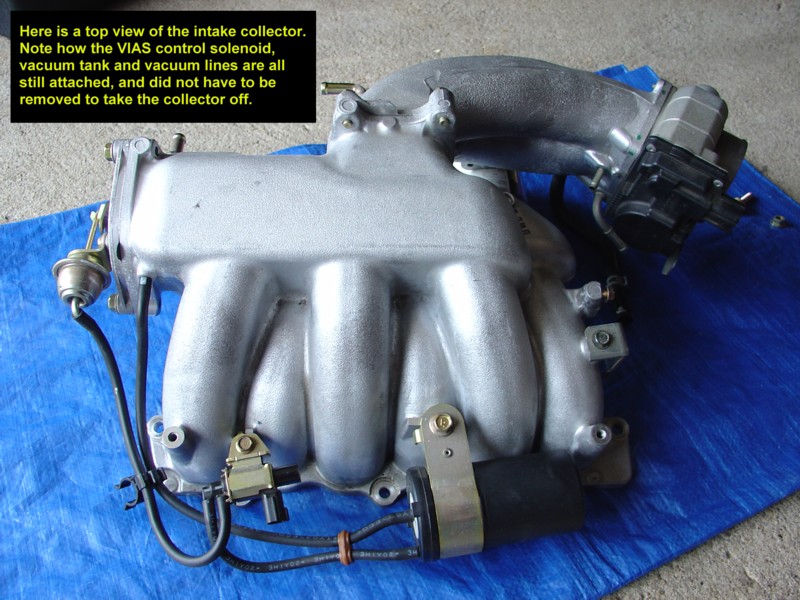
| Note how all of the assemblies remain attached when the collector comes off. |
 |
| 25 |
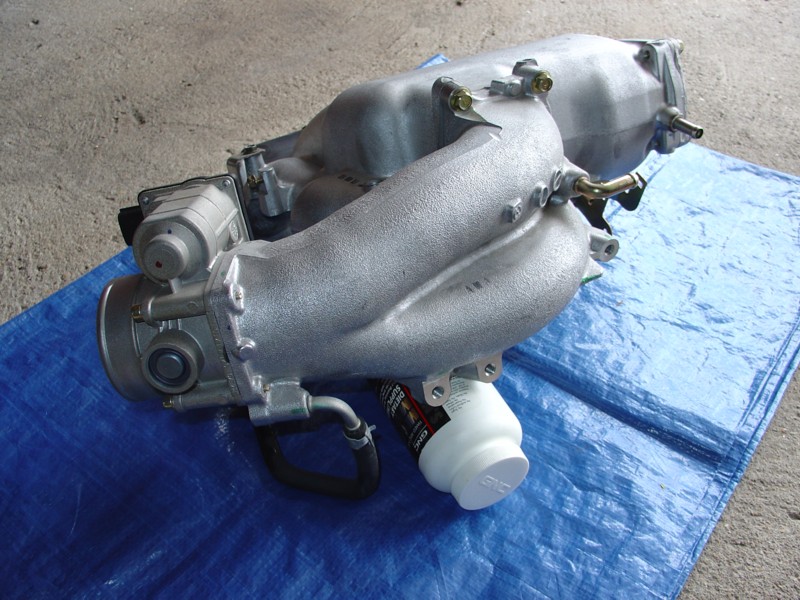
| Here is a side view. |
 |
| 26 |
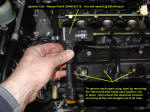
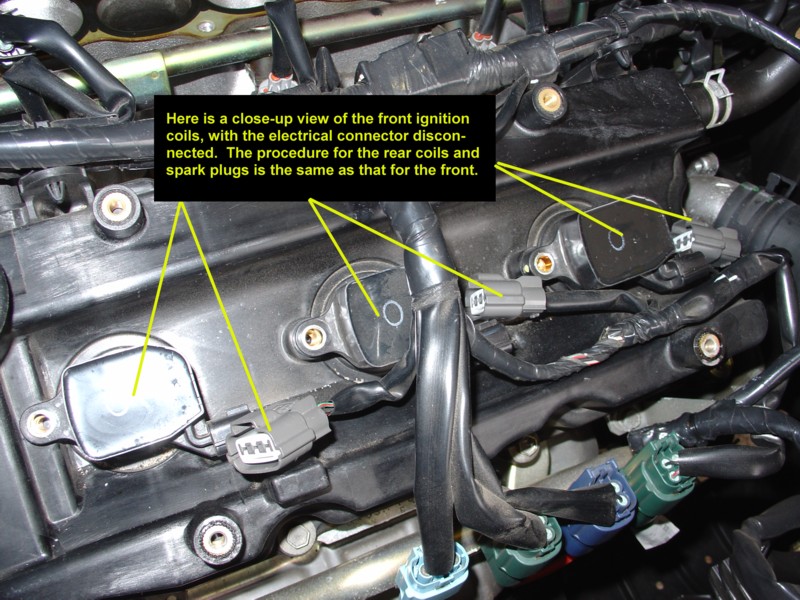
| The procedure to remove the coils is the same for the front bank as it is for the rear. Just take the 10mm bolt out, unplug the connector and pull it right out. |
 |
| 27 |
| This is what one coil looks like. |
 |
| 28 |
| Use a spark plug wrench to remove each plug. |
 |
| 29 |
| Nissan recommends you change this gasket any time the collector comes off. It is an expensive gasket, but why risk it? Buy a new one.
I do not show re-assembly here, but just follow these steps in reverse order. I hope I have de-mystified this process a little bit, and that you might be inspired to do this job yourself when the time comes. Good Luck, and you can do it. |


No comments:
Post a Comment