Tuesday, June 8, 2010

Understanding O.E., after market, and O.E.M. automotive parts

Do I really need to go with original equipment parts on my vehicle? Most people dont really understand the difference in O.E., O.E.M or just "Aftermarket" parts. So I am going to try to explain what these terms actually mean

For a passive buyer, these things are but ordinary terms used in the automotive market but for someone meticulous and who wants the best for his auto, these things matter considerably. Deciding which among these to purchase is just like deciding what car to buy.

O.E.M. stands for Original Equipment Manufactured. This means that OEM Ford parts are manufactured by Ford itself, Chevrolet parts are manufactured by Chevrolet, Toyota parts by Toyota, BMW parts by BMW and so on. The terms O.E.S. and OE are also used; these mean Original Equipment Supplied and Original Equipment, respectively. While in many cases, OEM and OES mean the same, OE is more general referring to any part that came as original equipment on the car. Some of OE car parts and components are not actually made by the car manufacturer but are purchased and assembled by the automakers to create a vehicle.

Those referred to as "Aftermarket"  auto parts" are not made by the original car manufacturer; furthermore, they are bought and added to the vehicle only at the dealership or after the vehicle left the dealership. In terms of design and function, aftermarket products are almost the same as the stock auto parts since they are primarily used to replace a damaged original part so that the vehicle can continue to run. If you need replacement parts for your car, however, you can either buy O.E.M. or aftermarket auto parts. There are numerous sources of aftermarket auto parts. Stores like Auto Parts Discount give you a great variety of parts for almost all makes and models.

Some cars, especially the base models are not completely equipped so users just add aftermarket parts later on. For example if you have purchased an old Toyota Corolla, you can add aftermarket Toyota fog lights, Toyota spoiler, Toyota turn signal light, or tail light lens or Toyota mirrors. Aftermarket products can also help you give your car a fresh new look. Even if your original parts are not yet damaged or worn out, you can replace them with or add specially designed aftermarket auto parts like Honda taillights, Ford center cap, Chevrolet chrome bumper, and Mercedes Benz Front Cover Towing Eye found at Auto Parts Discount.

Enthusiasts, on the other hand would opt for custom parts and specialty equipments. Compared to a universal fit auto part, which can be installed to any vehicle make, year and model, custom aftermarket products are designed to fit only a particular application. Examples of custom parts are your Ford hood, Ford fender and Ford doors. Specialty equipments on the other hand, are intended to make the vehicle more stylish, comfortable, convenient and more up-to-date.

Most auto users prefer aftermarket products because they are less expensive than OEM replacements. While it is true that there may be some aftermarket auto parts that do not meet high standards of original equipments, it is not right to say that aftermarket products are generally inferior in terms of quality and style. Replacement parts sold at Auto Parts Discount, for example are made by car parts manufacturers that are mandated by high international standards.
Which is better, OEM or aftermarket replacement part? It depends on the product. Some OEM parts are not durable enough while the aftermarket parts you use to replace them could last for many years. If you want to give your car a different look and also, if you want to save, aftermarket products are worth a try. However, make sure to get these replacement parts from trusted sources.
With all that being said, let me say that I would never go with an after market electronic component on any vehicle. Some aftermarket parts will fail alot more quickly than a part designed by the original manufacturer. Original equipment may be a little more expensive than aftermarket parts, but if you are replacing the aftermarket part 3 times when you would only have to replace an original part once, you are really not saving any money. But when it comes to parts like an exterior mirror, or a tail light lens, then I would recommend saving some cash and going with aftermarket parts.
If you would like to compare some prices, on O.E. and aftermarket parts then please feel free to search the data base. You can search by vehicle and part.
Reblog this post [with Zemanta]

Thursday, June 3, 2010

Acura clutch kit, replacement, parts

The importance of properly assembling your Acura. car parts cannot be underestimated. If safety and performance is important to you, then you need to make sure that all your car parts are correctly placed. Most drivers don t think about the Acura. clutch at all although they use it all the time. Sure, they may adjust and lubricate the clutch cable from time to time but this never really made them think about the clutch. They only notice it when it starts to get cranky or gets grabby and starts to slip. In general, the Acura clutch is the car part that provides the break in the power flow from the engine to the transmission and rear wheel. It stops your Acura while the engine is running and allows you to shift gears. There are three discs on the shaft that composes the clutch. The floating disc and the driven disc are attached to the engine crankshaft. These discs turn when the engine is running. The clutch hub, the third disc on the clutch, is located between the other two discs and turns freely on the shaft. This disc is attached by the drive belt to the transmission. When these three discs are pressed together, they turn simultaneously, thus transmitting engine power to the transmission. When the engine speed is increased, these three discs are forced together. However, the discs disengage when the engine is running at idle speed. When gear shifting is needed, the discs are disengaged with the clutch pedal. Some of the clutches made today are constructed of steel or high grade aluminum alloy. Some have also used improved friction materials to enhance clutch components. These enhancements have created long lasting clutch that riders can trust for distant rides. Nevertheless, after years of engaging and disengaging, your Acura clutch will finally wear out. No matter how well-engineered your clutch is its parts cannot endure the pressures of heat and friction forever. When shudder and slippage in your Acura clutch start to occur, you know that it is time for a new clutch. Common causes of clutch slippage includes improper clutch adjustment, incorrect use of throw out bearing, improper seating of the clutch, improper design of the clutch, incorrect gear ratio to tire diameter and failed or defective clutch assembly. If you are looking for Acura clutch replacement,Compare Prices here. .
Providing all the necessary hardware for proper installation, A good quality Acura clutch kit is conveniently available for specific vehicle applications. Crafted from high grade and durable metal construction, the product ensures product longevity and reliability which yields huge savings on replacement cost. Because a good clutch is necessary to have a responsive engine towards steering, the durability and material construction of the part must be the determining factors so you are guaranteed to enjoy seamless transmission with lighter handling or miles and miles of application without needing replacements.

An Acura. clutch kit comes with a clutch friction disc, clutch pressure plate, and some package includes pilot bushings or pilot bearings. The pressure plate is comprised with clutch plate, springs, cover, and release fingers which come in handy to complete your installation tasks in no time. Because securing the part in place or in position is necessary to optimize its efficiency, heavy duty hardware are bundled together for convenient product ordering to offer practical solution to maintenance.

Too much pressure on the pedal must be avoided to keep the part in top notch and responsive working conditions. Because your Acura clutch is constantly subject to enough strain and heat conducted via the drive shafts, it must be durable enough to bear harsh working environment. Good thing quality clutch kit manufacturers establish strength and rigidity while employing innovations in designs to enhance the performance and efficiency of your engine clutch. While other makes turn to manufacturers in the assembly of their vehicle?s engine specifications, maintaining engine precision is conveniently possible.

Located at the clutch assembly, the product contains non-ferrous friction material. To ensure full grip on its mechanisms for applications, the product is available in various designs which caters to original part replacement to performance enhancement. Based on one or more friction discs, the material construction of the part is similar to the ones used in brake shoes; it exhibits enough strength to bear with the pressure and heat that comes inevitable during transmission. Because the part works together with vacuum and hydraulic mechanisms, it must be kept in proper working conditions. Understanding that transmission as well as suspension components coincides and comes in contact with one another, daily wear and tear may render damage to your Acura clutch kit.

With routine check and immediate replacement for worn or warped discs, you can continually enjoy excellent engine performance that enables your Acura. to match your driving style. Prolonging the use of worn kits compromises fuel efficiency and overall performance of your vehicle; opting for immediate replacement for certain parts that goes beyond repair is a more practical and economical solution to maintain engine precision. Replacement of your Acura clutch kit is crucial to performance, and in avoiding costly repairs on your Acura at a later date.
Compare Prices here.

Mercedes Benz, Clutch Kit, Install, Service, Replacement

Single, dry, clutch friction disc. The splined...Image via WikipediaThe importance of properly assembling your Mercedes Benz. car parts cannot be underestimated. If safety and performance is important to you, then you need to make sure that all your car parts are correctly placed. Most drivers don't think about the Mercedes Benz clutch at all although they use it all the time. Sure, they may adjust and lubricate the clutch cable from time to time but this never really made them think about the clutch. They only notice it when it starts to get cranky or gets grabby and starts to slip. In general, the clutch is the car part that provides the break in the power flow from the engine to the transmission and rear wheel. It stops your car while the engine is running and allows you to shift gears. There are three discs on the shaft that composes the clutch. The floating disc and the driven disc are attached to the engine crankshaft. These discs turn when the engine is running. The clutch hub, the third disc on the clutch, is located between the other two discs and turns freely on the shaft. This disc is attached by the drive belt to the transmission. When these three discs are pressed together, they turn simultaneously, thus transmitting engine power to the transmission. When the engine speed is increased, these three discs are forced together. However, the discs disengage when the engine is running at idle speed. When gear shifting is needed, the discs are disengaged with the clutch pedal. Some of the clutches made today are constructed of steel or high grade aluminum alloy. Some have also used improved friction materials to enhance clutch components. These enhancements have created long lasting clutch that riders can trust for distant rides. Nevertheless, after years of engaging and disengaging, your Mercedes Benz. clutch will finally wear out. No matter how well-engineered your clutch is its parts cannot endure the pressures of heat and friction forever. When shudder and slippage in your Mercedes Benz clutch start to occur, you know that it is time for a new clutch. Common causes of clutch slippage includes improper clutch adjustment, incorrect use of throw out bearing, improper seating of the clutch, improper design of the clutch, incorrect gear ratio to tire diameter and failed or defective clutch assembly. Providing all the necessary hardware for proper installation, quality clutch kit is conveniently available for specific vehicle applications. Crafted from high grade and durable metal construction, the product ensures product longevity and reliability which yields huge savings on replacement cost. Because a good Mercedes Benz. clutch is necessary to have a responsive engine towards steering, the durability and material construction of the part must be the determining factors so you are guaranteed to enjoy seamless transmission with lighter handling or miles and miles of application without needing replacements. 

A Mercedes Benz clutch kit comes with a clutch friction disc, clutch pressure plate, and some package includes pilot bushings or pilot bearings. The pressure plate is comprised with clutch plate, springs, cover, and release fingers which come in handy to complete your installation tasks in no time. Because securing the part in place or in position is necessary to optimize its efficiency, heavy duty hardware are bundled together for convenient product ordering to offer practical solution to maintenance. 

Too much pressure on the pedal must be avoided to keep the part in top notch and responsive working conditions. Because your clutch is constantly subject to enough strain and heat conducted via the drive shafts, it must be durable enough to bear harsh working environment. Good thing quality clutch kit manufacturers establish strength and rigidity while employing innovations in designs to enhance the performance and efficiency of your engine clutch. While other makes turn to manufacturers in the assembly of their vehicle?s engine specifications, maintaining engine precision is conveniently possible.Compare prices here. 

Located at the clutch assembly, the product contains non-ferrous friction material. To ensure full grip on its mechanisms for applications, the product is available in various designs which caters to original part replacement to performance enhancement. Based on one or more friction discs, the material construction of the part is similar to the ones used in brake shoes; it exhibits enough strength to bear with the pressure and heat that comes inevitable during transmission. Because the part works together with vacuum and hydraulic mechanisms, it must be kept in proper working conditions. Understanding that transmission as well as suspension components coincides and comes in contact with one another, daily wear and tear may render damage to your clutch kit. 

With routine check and immediate replacement for worn or warped discs, you can continually enjoy excellent engine performance that enables your Mercedes Benz to match your driving style. Prolonging the use of worn kits compromises fuel efficiency and overall performance of your  Mercedes Benz. z; opting for immediate replacement for certain parts that goes beyond repair is a more practical and economical solution to maintain engine precision.
To get an idea of what your Mercedes Benz replacement clutch will cost you, click here.
Enhanced by Zemanta

Monday, May 10, 2010

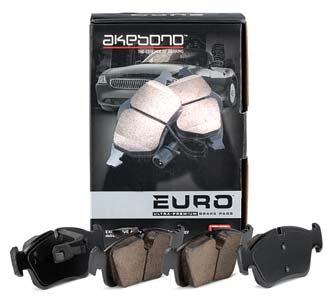
Akebono Brake Pads, What is the best Brake pad?

What is the best brake pad?
Cruising along the interstate, creeping through rush hour traffic or navigating through your neighborhood, you count on your brakes to stop your vehicle every time with smooth, quiet assurance. Why possibly compromise braking performance just because it is time to replace your brake pads? Today, motorists have an option to restore OE performance. The number one choice of automakers can now be yours. Choose Akebono ProAct Ceramic Brake Disc Pads from Akebono, validated by global automakers to ensure that your vehicle will stop like new.

Ultra Quiet
Nobody Likes Brake Noise. We've developed hundreds of unique Akebono ProAct Ceramic formulations to reduce and/or virtually eliminate brake squealing, groaning and vibration. The days of frustrating returns to the brake shop are over.
Low Dusting
There's No Need To Fret Over Wheel Dust. The Carefully selected materials found in Akebono ProAct Ceramic Brake Pads are more compatible with today's popular aluminum, open-wheel designs. They help minimize and/or virtually eliminate dusting.
Enhanced Durability
See You Later - Much Later. For the vast majority of motorists, Akebono ProAct Ceramic Brake Pads provide significantly improved pad wear performance in normal driving conditions compared to traditional brake pads. This means longer time between brake jobs.
Smooth Braking
Brake with Control and Confidence. Akebono ProAct Ceramic Brake Pads provide more consistent, smooth stopping power over a wide range of driving conditions, including panic stops.
Vehicle-Optomized Formulations
One Size Does Not Fit All. Akebono ProAct Ceramic Brake Pads are formulated to meet the specific OE quality, fit and performance requirements for your vehicle. More than 150 pads are available for virtually every domestic, Japanese and European car and truck built since 1990.
Akebono is the first brake pad manufacturer to produce a true ceramic pad for European vehicles that delivers the same European pedal feel and stopping power as the Original Equipment (OE) pads. Akebono's exclusive clean wheel formulations help to eliminate the heavy brake dust issues normally associated with the OE pads, too, and a definitive control of noise, vibration and harshness is felt.

One hundred percent asbestos-free, the pads' Advanced Ceramic Technology helps to extend rotor life resulting in fewer rotor replacements (and additional dollars saved).
Akebono Euro pads are approved for use by Audi, Mercedes-Benz and Volkswagen.


So to sum up the benefits of Akebono ceramic brake pads, the three main reasons why more and more people are choosing ceramic over metallic:


Cool: Akebono Ceramic brake pads are designed to distribute heat equally or better than metallic pads. Studies have shown ceramic pads to perform up to 350 degrees cooler than semi-metallic pads resulting in consistent braking power on each and every stop.


CLEAN: With each and every stop ceramic pads do not produce the dirty brake dust you typically get with a metallic pad leaving your car's tires and rims virtually clean with less rotor wear.


QUIET:Akebono Ceramic brake pads quiet the harsh noises that you typically hear with metallic pads due to far less friction on the rotors.


Reblog this post [with Zemanta]

Friday, April 16, 2010

Low fuel mileage, Nissan Maxima

What should I do if my fuel economy is excessively low on my Nissan Maxima?


If your fuel economy is excessively low on your Nissan Maxima, your vehicle may need to be serviced or repaired. You may want to contact your Nissan dealer or a reputable repair facility to check your vehicle. The following are some of the diagnostic checks a mechanic will typically conduct for poor mpg on your Nissan Maxima:


Perform "On-Board Diagnostic System Check" for diagnostic trouble codes (sensors or actuators which may be malfunctioning)

Check for dragging brakes

Check transmission shift patterns for slipping, use of all gears, lock-up operation

Check ignition timing

Check owner's driving habits including A/C usage, hard accelerations, carrying heavy loads

Check emission control system

Check vacuum hoses for leaks, kinks, proper routing

Check tire pressure

Check fuel type, quality, and alcohol content

Check fuel pressure and fuel system for leaks

Check air cleaner element

Check coolant level

Check ignition system for wet plugs, cracks, wear, improper gap, burned electrodes, or heavy deposits, cracking or improperly connected ignition wires

Check for proper calibration of speedometer

In extreme cases, there may be engine problems such as poor compression or faulty fuel injectors. Replacing fuel injectors on a Nissan Maxima is not for the beginner or backyard tech. It is advisable to take it to the Nissan Dealership or a repair shop that you trust.

Low fuel mileage, Honda Prelude

What should I do if my fuel economy is excessively low on my Honda Prelude?

If your fuel economy is excessively low on your Honda prelude, your vehicle may need to be serviced or repaired. You may want to contact your Honda dealer or a reputable repair facility to check your vehicle. The following are some of the diagnostic checks a mechanic will typically conduct for poor mpg on your Honda Prelude:

Perform "On-Board Diagnostic System Check" for diagnostic trouble codes (sensors or actuators which may be malfunctioning)
Check for dragging brakes
Check transmission shift patterns for slipping, use of all gears, lock-up operation
Check ignition timing
Check owner's driving habits including A/C usage, hard accelerations, carrying heavy loads
Check emission control system
Check vacuum hoses for leaks, kinks, proper routing
Check tire pressure
Check fuel type, quality, and alcohol content
Check fuel pressure and fuel system for leaks
Check air cleaner element
Check coolant level
Check ignition system for wet plugs, cracks, wear, improper gap, burned electrodes, or heavy deposits, cracking or improperly connected ignition wires
Check for proper calibration of speedometer
In extreme cases, there may be engine problems such as poor compression or faulty fuel injectors. Replacing fuel injectors on a Honda Prelude is not for the beginner or backyard tech. It is advisable to take it to the Honda Dealership or a repair shop that you trust.
Enhanced by Zemanta

Wednesday, November 25, 2009

Air suspension, why it fails and coverting to standard shock and struts

When electronic suspensions with air springs were first introduced 20 years ago on the Lincoln Continental and Mark VII, few people would have imagined that someday this new technology would create a booming business for servicing air ride suspensions. But it has, and it's a market that shows no signs of deflation anytime soon. Here's why: Air springs and electronic ride controls provide a cushy, boulevard ride, but the ride doesn't last forever. All air suspensions share a common vulnerability: air leaks. And when a system can no longer hold air, it goes flat. The undercar environment is a harsh one that's exposed to road splash, salt and debris. Rubber loses elasticity as it ages, becomes hard and eventually cracks. After seven to 10 years of service, many of these older systems start to develop leaks that allow air to escape from the system eventually causing failure. The same thing can happen to plastic air lines. Wiring connectors, solenoids, compressors and height sensors are also vulnerable to corrosion and vibration, which over time may lead to failures that disrupt the normal operation of the air ride system. Now comes the good part (or the bad part if you're the vehicle owner). When an air ride suspension system goes flat, or fails it can be very expensive to fix. OEM parts are sky high and may not even be available for some of the older applications. Remanufactured OEM and new aftermarket electronic air struts and compressors can provide a more cost-effective alternative for those who want to retain the full functionality of their air ride suspension. The other option is to replace the original air springs and/or electronic struts or shocks with a conversion kit that includes conventional coil steel springs with ordinary struts or shocks. 


AIR SUSPENSION CONVERSION KITS Aftermarket conversion kits for the older cars with air ride suspensions have become a hot item in recent years because the kits provide a repair solution for vehicles that might otherwise be too expensive to fix. For example, a set of four new OEM air struts and a compressor for a 10-year-old 1994 Lincoln Continental retail for around $3,500. Add in the installation labor and it adds up to a lot of money to spend on a car that is worth maybe $2,500. The same car could be converted to a regular coil spring suspension for around $500 to $600 in parts, and it would probably be a lifetime repair (no future air leaks, compressor failures or electronic glitches to worry about). On a Lexus, the numbers are even higher. The OEM air struts list for $1,100 per wheel! If the compressor also needs to be replaced, the parts bill alone is around $5,800. By comparison, a conversion kit for this vehicle typically sells for less than $800 and includes struts for all four wheels. The only tradeoff of installing a conversion kit is that a vehicle will no longer have a cushy air ride suspension or be self-leveling. For many owners, that's no big deal because many people say air ride suspensions are overly soft and allow too much wallow when cornering. They would actually prefer a firmer handling suspension. Others, though, might be reluctant to trade their air ride suspension for a conventional suspension. Even so, most of these people will probably realize it makes more sense to convert the suspension than to sink a pile of money into a car that has already depreciated so much in value. The ironic part about all of this is that some people will gladly spend thousands of dollars to transform their vehicle into a pavement scraping "low rider" while others moan and complain about having to spend so much to fix their unintentional low rider because the air suspension has gone flat. One other change that is usually required when converting an air ride suspension is to disable or "fool" the system module. Procedures vary depending on the application, but may require removing a fuse, cutting a wire or splicing a resistor into a strut wiring harness to trick the module into thinking a solenoid or height sensor is still there when it is not. Make sure to review the conversion kit's instructions or check other sources like manufacturer TSBs. Not following the proper procedures can effect other systems controlled by the body control module


AIR RIDE SUSPENSION OPTIONS This brings up another potential service opportunity: converting conventional suspensions to air ride suspensions. It's not a traditional kind of repair job, but it is one that can be profitable, especially if you're searching for a niche market to expand your business. A whole new generation of younger vehicle owners are spending serious money these days customizing sport compact cars. The hot nameplates are Honda, Accord and Mitsubishi, but you'll also see Chevy Cavaliers, Ford Focuses and other nameplates among their ranks. The upgrades are done to improve ride and handling as much as cosmetics. The owners of sport compact cars will buy larger diameter 17- to 19-inch alloy wheels, sticky ultra low profile street performance tires, beefier sway bars, high pressure monotube gas struts and shocks, drilled and vented brake rotors, wings, spoilers, low restriction air intakes and mufflers, and lots of other bolt-on accessories. Coil-over kits that replace the stock struts are a popular upgrade for making suspension adjustments and lowering ride height, and now we're seeing aftermarket coil-overs that use an air spring instead of a steel spring for a fully adjustable suspension on the fly. One such system that has just been released uses air strut suspension with adjustable height, rate and dampening. The kit includes air spring struts, compressor, dryer, lines and driver-adjustable control module. It's available now for the 2002 and up Subaru WRX, and will also be available for a number of popular sport compact cars. Another upgrade possibility is installing air shocks or air helper springs on vehicles that are used for towing or hauling. Here, air provides extra load carrying capacity to keep the rear end from sagging when a vehicle is heavily loaded. Installation is easy and requires no wiring or other changes. 


GROWING MARKET If performance modifications are not your thing, there's still plenty of repair work to be done on aging vehicles with electronic air suspensions. Current applications include Lincoln Continental, Town Car, Mark VII and VIII, Ford Crown Vic, Mercury Grand Marquis, fullsize Chevy, Buick and Oldsmobiles, Cadillac Deville, Seville and Eldorado, various Chrysler models, Dodge Dynasty, older Jaguar models, Land Rover, Range Rover, Lexus, Lincoln Navigator, Ford Expedition and Ford F250 pickups, and Mazda MPV. AIR RIDE BASICS With an air ride suspension, hollow inflatable rubber bags (air springs) are used in place of ordinary coil steel springs or leaf springs. The rubber bags are flexible and have a certain amount of give, so they help absorb and dampen bumps to better isolate the suspension from the vehicle's occupants. Air springs also provide a variable spring rate and offer increased stiffness the more they are compressed. On some vehicles, an air bladder is incorporated into a strut or shock to provide additional dampening and/or ride height control. Air shocks are one such example, and are often used on the rear for automatic load leveling. On some applications, a strut may have both a conventional steel spring with an additional air bladder on top to vary ride height and/or spring stiffness. Most air suspensions and automatic load leveling systems use some type of height sensor to monitor ride height. When the suspension is lower than its normal ride height, the system module energizes a relay to turn on a compressor and pump air into the air springs, shocks or struts through solenoid valves. When the desired ride height is reached, the module turns the compressor turns off and remains on standby until further corrections are needed. If ride height is too high because a heavily loaded vehicle has just been unloaded, the system module will open solenoids to vent air from the springs. Maintaining a consistent ride height is important because ride height affects wheel alignment, tire wear handling, traction and the aiming of the headlights. It can even affect fuel economy at highway speeds. Some late-model SUVs with air ride suspensions automatically lower themselves an inch or two at highways speeds to improve their aerodynamics and reduce wind resistance. The driver may also have a ride height switch that allows him to increase ride height and ground clearance when driving off-road. On many applications, the air ride system may remain active for a certain period of time after the engine has been turned off. The system continues to monitor ride height and may make corrections by adding or venting air as needed. There may be a built-in delay so the corrections do not occur immediately when the occupants exit the vehicle or unload the trunk. Understanding the operating logic of an air ride suspension system is important when trying to make a diagnosis because all of these systems are different. If you don't understand the logic, you can't always tell if the system is functioning correctly or not.


LINCOLN AIR SUSPENSION On the older Lincoln systems, the control module monitors ride height for up to an hour after the ignition is turned off, venting pressure as needed to maintain correct ride height. During this time it will lower, but not raise the vehicle. At the end of the hour, the compressor will kick in for up to 30 seconds to add air if ride height is low. After that, it shuts down and makes no further corrections until the ignition is turned back on. When the ignition is turned on, the system will raise ride height if necessary, but not lower it. After 45 seconds, it will then make lowering corrections as needed, but only if all the doors are closed. It will not make any corrections if the brake pedal is depressed. Once the system is in its "driving" mode, it averages input from the height sensors before making any adjustments in attitude. This prevents the suspension from trying to compensate for every bump in the road. Only when a continuous high or low indication is present for more than 45 seconds will it react and make a change. If a change in ride height isn't accomplished within three minutes after the need is indicated, the system warning lamp comes on and stays on as long as the ignition remains on. When the key is turned off, the warning lamp will go out and remain out unless the same problem is indicated the next time the key is on. AIR RIDE failure Air suspension problems fall into one of three categories:
  • Electrical - Problems with the height sensors, air spring solenoids, module control circuit, compressor relay, compressor or vent solenoid. These can be isolated by using the system's self-diagnostic procedures (if available) and various volt/ohm checks. Service consists of replacing the faulty component or wiring, or readjusting the height sensors. Electronic problems will usually set a fault code and turn on a warning or failure light. On the older vehicles, there is usually a self-diagnostic procedure for reading the codes and doing self-tests. On newer vehicles, codes can usually be accessed with a scan tool. On the more sophisticated systems, you may need a bidirectional scan tool with the appropriate software to do system tests and to recalibrate height sensors. On late-model Cadillacs with the CVRSS electronic suspension, you can get codes by pressing the WARM and OFF buttons on the climate control system simultaneously. Refer to a manual for the code retrieval and clearing procedure when using the panel buttons.
  • Air supply - Leaky or obstructed air lines, faulty compressor or spring solenoids. Diagnosis is made via the self-test and visual inspection. A bad compressor or solenoid must be replaced, but damaged air lines can be repaired by splicing. Result: Failure
  • NOTE: One of the leading causes of compressor failure is air leaks (usually in the air springs or lines). If the compressor is constantly running, it's going to work itself to an early death. If you're replacing a compressor, the dryer should also be changed to protect the new unit from moisture. If the dryer is saturated with moisture, it can create backpressure that can overload and burn out a compressor.
  • Air springs - Leaking, damaged, deflated or unfolded springs. Damaged springs must be replaced as an individual assembly (replacement in pairs is not necessary with air springs). If unfolded, the spring must be carefully inspected for cuts or cracks before it is reinflated.
GENERAL SERVICE PRECAUTIONS The first thing to keep in mind when servicing vehicles with electronic air suspensions is to watch out for those that are self-leveling - especially if the vehicle is going to be raised on a lift to change the tires or work on the brakes. If you're working on a Lincoln or a Ford Crown Victoria with an electronic air suspension, there's a switch in the trunk to deactivate the system. If the system is not turned off, it will remain active after the ignition is switched off and try to level itself when the wheels are raised off the ground by venting air from the air springs. When the vehicle is then lowered back down, the suspension may go flat because there's no air in the bags. Later systems are supposed to maintain a minimum pressure in the springs so this doesn't happen, but it's no guarantee the vehicle will have enough ride height to clear the lift. You also want to deactivate a self-leveling suspension when doing brake or suspension work. Why? Because you don't want the suspension moving because a height sensor is telling the system module the vehicle is riding high. Disconnecting a battery cable will also deactivate an electronic self-leveling suspension, but you'll also cut power to all the other onboard electronics. So to save yourself the embarrassment of erasing all the preset channels on the radio as well as the PCM's memory, use the deactivation switch (if one is provided) or find and pull the fuse that powers the self-leveling control module or air compressor. Don't forget to reactive the system after the vehicle has been serviced or it may cause the warning light to come on then next time the vehicle is driven. Another thing to keep in mind on Lincolns, Fords and other vehicles with full air spring suspensions is that the air springs support the weight of the chassis and are under pressure (25 psi minimum - unless the springs have gone flat). Do not vent an inflated spring or remove a spring solenoid unless the vehicle is supported on a frame contact hoist, or the chassis is supported by safety stands when the wheels are off the ground. Why? Because the chassis will drop when air is let out of the springs.

Tuesday, November 3, 2009

2002 Honda check engine light is on, how do I turn off the check engine light?

2002 Honda check engine light is on, how do I turn off the check engine light?
The proper way to turn off the check engine light on a 2002 honda accord, of course, is to repair the problem that caused it to come on. Another way I read on a website was to bring your car to an Autozone who will diagnose the problem and reset the light for you (and hope you buy the part to fix the problem). The quick and dirty way is to remove one of the battery cables for about 10 seconds (when the engine is off of course) then reconnect it.
-It is actually illegal for Autozone employees to just erase the engine code because they did it before and got sued by several people because they erased the engine code and then something went wrong with the car and the people got hurt in accidents. so they arent actually supposed to. i only know because my boyfriend works there and he and his boss explained this to me one day when i was curious about this exact thing and started asking questions.
I just had the EGR valve replaced on our 2002 Accord for the second time in two years. At least the price of the part has come down a huge amount in this time - from $300 to $70 - I suppose since it is a mass produced item since so many 98 Accords have this problem. The last time the car had under 80Kmi so was under warranty but this time I paid an independent mechanic $170 which included the part. He said it is a poor design since even a speck of carbon in the EGR valve can cause it to stay open and the check engine light to come on. And he expects it will happen more often as the car gets older.
An guy who is a mechanic where I work said he thought it was best to clean out the deposits and a good product to do this was Marvel Mystery Oil (at Walmart for about $2 per pint). He said to use 4 oz in the gas tank when filling once per month for a few months. Besides possibly preventing the valve from fouling as often, this should also allow the car to run longer without needing premium fuel, according to him.
Every Honda I have had (and all I have had is Hondas for well over 20 years) has required midgrade fuel at about 120Kmi then premium at around 160Kmi to prevent it from pinging, no matter how many times I had it tuned, the plugs replaced, and the valves adjusted. The guy said the Marvel Mystery Oil will fix this, too - use it once per month until the premium fuel is no longer needed, which will take 3 to 4 months. I have no idea if this will work (it's a Mystery to me! ) but I will give it a try since otherwise this is still an excellent car.
Here is more input from others:
When I bought the 2002 Honda Accord the salesmen told me that the Check Engine Light would come on at about 7K miles and not to be alarmed. This would be freindly a reminder to bring it in for the 1st service he said. Well just as the guy said at aproximatly 7K the check engine light came on. I called the service department and he insisted on me bringing it in so that they would perform the normal oil/filter changes then reset the light. After a bit I convinced the guy to tell me how to reset the light.
THIS IS HOW YOU RESET THE CHECK ENGINE LIGHT ON THE 2002 HONDA ACCORD. 1. With the Car Off, Press and hold down the Odometer Trip Reset Button. 2. While still pressing the Trip Reset Button, Turn the Ignition Key half way on where all your oil, check engine lights etc.. turn on. Don't turn it as far as you would to normally start the car. Wait a few seconds and the Check engine light will turn off. 3. Turn the key back to the Off position and you're done. What a scam Honda has with the BS Check Engine Light.
In the repair book it says to remove the number 13 (clock back up) fuse on the passenger side while the ignition is off for 10 seconds. That should work according to the repair. If the light comes back on then u might have a problem.
Two different things being addressed on this whole topic. 1. To reset the "Maint Rqrd" light, you push and hold the reset knob and then engage the accessories via the the ignition switch. 2. To reset the "Check Engine" light, you need to either pull the fuse already mentioned in previous answers or disconnect the negative battery cable for a while. (Then make sure you know the Radio Code to reset your radio unit so it works).
The previous steps for resetting the service light and the check engine light also work on the 2002 Honda Accord. Excellent insights! Thank you! Just a note for the novice repairmen: the fuse panel is inside the passenger door on the side of the dash assembly (not under the hood).
First you need to determine if it is a "check engine light" or a "maintainance required light" A check engine light is usually an amber light with the picture of an engine with a line through it. If this light is on you should take it to a QUALIFIED REPAIR TECHNICIAN who is capable of working on a Honda. They have all the tools needed to diagnose your repair.If it is a maint. required light new Honda"s are reset by holding the trip reset button down and turn the ignition switch to "on" while holding the button. wait until the light goes out (about 15 seconds) before releasing the button. This light will come on every 7500 miles.
AS YOU KNOW THE CHECK ENGINE LIGHT COMES ON FOR A VARIETY OF REASONS. A DIAGNOSTIC WOULD NEED TO BE RUN TO SEE WHAT CODES ARE COMING UP. ASSUMING THAT YOU HAVE DONE THIS AND MADE THE NECESSARY REPAIRS AT A SHOP, THEN THE SHOP SHOULD HAVE RESET THE CHECK ENGINE LIGHT. IF YOU DID THE REPAIRS YOURSELF YOU CAN DISCONNECT THE BATTERY(BOTH POSITIVE AND NEGATIVE TERMINALS) LET IT SIT FOR ABOUT 15-30 MINUTES. IF YOU RECONNECT THE BATTERY AND START THE ENGINE AND THE CHECK ENGINE LIGHT COMES BACK ON, THEN ALL OF THE NECESSARY REPAIRS HAVE NOT BEEN DONE.
All you have to do is disconnect the Negative battery terminal. It is not necessary to disconnect both. Once you've disconnected the terminal, let the car sit with no power for a few minutes, then reconnect the battery terminal. Your light should not come on, unless your engine sensors throw another code through your car's computer.
You DO NOT need to disconnect the battery terminals. All you have to do is turn the key to the "on" position (not running, but so that the radio etc. come on) and hold the trip reset button for about 15-20 seconds. KEEP IN MIND - that the light could be an indication of needed service as opposed to just coming on based on mileage.
To be clear, you must hold in the trip odometer reset button and THEN turn the key to the "on" position. If you prefer the battery disconnect method, be sure you have your radio code handy to re-initiate.
A couple things real quick. The MAINTENANCE LIGHT can be reset by holding down the odometer while turning the key. You can reset the CHECK ENGINE LAMP (technically the "MIL"...stands for "MALFUNCTION Indicator Lamp") by removing the power supply to the "ECU"...stands for "Engine Control Unit" or "Electronic Control Unit" depending on the manufacturer. This will clear all OBDII (On-Board Diagnostic II) codes without question (I'm assuming we are working on a 1996 or newer vehicle when I reference the OBDII, but even if not the codes will still be cleared.) This can be definitely be accomplished by removing the negative cable for a couple minutes and probably by removing the radio fuse like the manual says (in Hondas the two general share that constant power source for memory functions such as fault codes, radio stations, and whatnot.) If you are doing this to get through an emissions inspection where they hook up to the computer via the OBDII connector you'll have to wait anywhere from 5 to 50 miles, rarely longer, for the computer to run a series of diagnostic self checks on the different systems. Until that happens the inspection will not even initiate because, guess what, the EPA that mandates the OBDII system is not a bunch of idiots. They require manufacturers to meet specific requirements when programming these rascals and the self-checks (known technically as "Readiness Monitors") are one of them. For this type of inspection two (2) of these "Readiness Monitors" can be left unchecked when inspected on vehicles up to 1999, from 2000 on only one (1) "Readiness Monitor" is allowed to be unchecked for the inspection to initialize. Also, you should know that when a diagnostic query is made on that computer a block of time before and after the error is stored. This block contains all of the vehicles streaming telemetric data at the time of the fault(s). When you erase the code you erase that data too. This information is extremely helpful to anyone trying to diagnose your problem. They'll be able to tell if the engine was hot or cold, what your speed was, what RPM range, how much air and how much fuel the engine was using, the position of the throttle, how hot the air coming into the engine was, and a lot of other stuff that they'll definitely be billing you for should they have to take the time to recreate the problem to regather a large enough data set to make a proper diagnosis. Should you clear the codes, they'll be able to see that too, by looking at how many key starts/warm up cycles and how many "Readiness Monitor" checks have occurred since the car had the battery disconnected/codes cleared. The mechanic in me gets thoroughly irritated when Jiffy Lube or some parts store clears the code after checking it and not knowing how to fix it or even what it is besides what the scan tool in their hand or their computer tells them the description is...and not the slightest clue how to properly go behind the computer and manually check the systems (after all car computers can go bad too and report false positives). It'd be ashame to replace even just a hundred dollars worth of sensor(s) only to find out you actually needed a $200-$1200 computer [don't know the year]). When the customer comes to me with only a code in their hand and says I need this fixed, I just shake my head...okay, all you have is the code guess the entire system will have to be checked instead of keying in on specifics within the fault data set. This can be most frustrating to a mechanic, but the businessman in me just wants to laugh...SURE, Heck yeah, must be a tough one, if Joe Bob Partscounterman with his high dollar scan tool can't figure it out then we'll probably have to spend awhile on it (I really don't gouge in this scenario, but there are plenty who do...by the way Joe Bob's scan tool is what we call a generic scanner and probably cost the store about $300-$600...pretty expensive right, NOPE a shop that services your type car should have something a bit more specific to your car, such as our $2200+ Teradyne Tester w/ Honda software [1])...an hour & half or three later in real time, if you come out on the lucky side of this I tell you, you need a set of plugs and somebody misrouted a vacuum hose and you just wasted good money and hours of our time (mainly trying to get it to act up/set a code/etc.), and yes, believe it or not most mechanics do feel like it's a waste of time regardless of whether or not you're paying. On the flip side of this I come back to you and say yeah your torque converter is starting to come apart and clogged up some of the fluid passageways in your transmission which led to some of the other internal components burning up and we'll need to take it out, tear it down, and make a list...but it shouldn't be too bad though considering there doesn't seem to be any obvious symptoms, all the gears stills function so the hardparts should be good. At this point, the customer asks how much and I tell him around a $1000.00 since we caught it early. EARLY! they exclaim...$1000.00! they cry, but it doesn't feel like anything's wrong, and I tell them, "That's because ingenius Honda engineers programmed an alternate shift pattern for events such as this to save the hard parts. That way it can make it to the shop when the "MIL" comes on without doing huge amounts of damage running the bill up even higher for a full overhaul. Generally we'd just have to replace the torque converter for $400-$600, but this one must have come apart too fast and now we're dealing with internals," I say. IT'S AT THIS EXACT MOMENT THAT EVERY SHOP OWNER/MECHANIC/SERVICE WRITER/ETC. CAN SEE IT IN THEIR FACE, THEY WANT TO KICK THEMSELVES SO HARD IN THE . "WHY DID I PUT IT OFF! WHAT DOES A PARTS GUY AT SUCH & SUCH AUTO PARTS KNOW ABOUT THE INSIDE OF A TRANSMISSION, IF HE'S SO SMART HE'D BE DOING THIS NOT THAT" AND IT'S AT THIS EXACT MOMENT THAT EVERY ONE OF US CAN'T HELP BUT FEEL WHAT THE GERMANS CALL "SCHADENFREUDE" (look it up). It's the truth, a human being in that scenario might outwardly show some empathy or at least professionlism, but inside the mischievous little voice in our heads is laughing it's rear-end off. Unless you personally unplugged something and right after that the light came on, don't disconnect the battery to reset the light, especially if this is for a state inspection and it's due this month. By the way I used the transmission example because I just dealt with this for fella on his Toyota 4Runner. He was so man he was going to take me to court because he thought I was trying to rip him off. I ended up making a deal with him. He'd take it to a dealer (I'm an independent), have them check it, and if I was wrong I'd give him a refund and reimburse him for the tow to the dealer. After the dealer looked at it and told him they didn't rebuild transmissions he was informed he'd need to buy another for well over $2,000. Needless to say we did that for him, and now his little around town beater (again his description) is in having an entire list (mostly his list LOL) done to it. It's actually pretty funny, in my experience it's situations like these that make the best customers.
All you do is take a key and push the little black indent part, and light goes back to green.
Fuse 13 worked like a charm. When I plugged it back in the headlights came on. I use auto-off and had to cycle them manually once. Check Engine is off. We'll give it 50-100 miles and see. THANKS
The best and only true way to reset a "check engine light" is not to go to Autozone or any where that has a scan tool or OBD II and have it turned off just fix the problem then a auto technican will turn it off or it will just come back on in a matter of time,
DON'T disconnect the battery your just going to reset your vehicles memory and reset all emission monitors and have to go through a drive cycle and by time it resets its going to trigger the "engine light" agian. So there is the basics on your 2002 honda accord check engine light and how to turn it off.

2001 Honda Accord Check Engine light is on, how do I turn off the Check engine light

2001 Accord Check Engine Light is on, How do I turn off the check engine light?

The proper way, of course, is to repair the problem that caused it to come on. Another way I read on a website was to bring your car to an Autozone who will diagnose the problem and reset the light for you (and hope you buy the part to fix the problem). The quick and dirty way is to remove one of the battery cables for about 10 seconds (when the engine is off of course) then reconnect it.

-It is actually illegal for Autozone employees to just erase the engine code because they did it before and got sued by several people because they erased the engine code and then something went wrong with the car and the people got hurt in accidents. so they arent actually supposed to.

I just had the EGR valve replaced on our 98 Accord for the second time in two years. At least the price of the part has come down a huge amount in this time - from $300 to $70 - I suppose since it is a mass produced item since so many 98 Accords have this problem. The last time the car had under 80Kmi so was under warranty but this time I paid an independent mechanic $170 which included the part. He said it is a poor design since even a speck of carbon in the EGR valve can cause it to stay open and the check engine light to come on. And he expects it will happen more often as the car gets older.

An guy who is a mechanic where I work said he thought it was best to clean out the deposits and a good product to do this was Marvel Mystery Oil (at Walmart for about $2 per pint). He said to use 4 oz in the gas tank when filling once per month for a few months. Besides possibly preventing the valve from fouling as often, this should also allow the car to run longer without needing premium fuel, according to him.

Every 20001 Honda I have had (and all I have had is Hondas for well over 20 years) has required midgrade fuel at about 120Kmi then premium at around 160Kmi to prevent it from pinging, no matter how many times I had it tuned, the plugs replaced, and the valves adjusted. The guy said the Marvel Mystery Oil will fix this, too - use it once per month until the premium fuel is no longer needed, which will take 3 to 4 months. I have no idea if this will work (it's a Mystery to me! ) but I will give it a try since otherwise this is still an excellent car.

Here is more input from others:

When I bought the 2001 Accord the salesmen told me that the Check Engine Light would come on at about 7K miles and not to be alarmed. This would be freindly a reminder to bring it in for the 1st service he said. Well just as the guy said at aproximatly 7K the check engine light came on. I called the service department and he insisted on me bringing it in so that they would perform the normal oil/filter changes then reset the light. After a bit I convinced the guy to tell me how to reset the light.

THIS IS HOW YOU RESET THE CHECK ENGINE LIGHT ON THE 2001 HONDA ACCORD. 1. With the Car Off, Press and hold down the Odometer Trip Reset Button. 2. While still pressing the Trip Reset Button, Turn the Ignition Key half way on where all your oil, check engine lights etc.. turn on. Don't turn it as far as you would to normally start the car. Wait a few seconds and the Check engine light will turn off. 3. Turn the key back to the Off position and you're done. What a scam Honda has with the BS Check Engine Light.
In the repair book it says to remove the number 13 (clock back up) fuse on the passenger side while the ignition is off for 10 seconds. That should work according to the repair. If the light comes back on then u might have a problem.
Two different things being addressed on this whole topic.

1. To reset the "Maint Rqrd" light, you push and hold the reset knob and then engage the accessories via the the ignition switch.

2. To reset the "Check Engine" light, you need to either pull the fuse already mentioned in previous answers or disconnect the negative battery cable for a while. (Then make sure you know the Radio Code to reset your radio unit so it works).
The previous steps for resetting the service light and the check engine light also work on the 2001 Honda Accord. Excellent insights! Thank you! Just a note for the novice repairmen: the fuse panel is inside the passenger door on the side of the dash assembly (not under the hood).

First you need to determine if it is a "check engine light" or a "maintainance required light" A check engine light is usually an amber light with the picture of an engine with a line through it. If this light is on you should take it to a QUALIFIED REPAIR TECHNICIAN who is capable of working on a Honda. They have all the tools needed to diagnose your repair.If it is a maint. required light new Honda"s are reset by holding the trip reset button down and turn the ignition switch to "on" while holding the button. wait until the light goes out (about 15 seconds) before releasing the button. This light will come on every 7500 miles.

AS YOU KNOW THE CHECK ENGINE LIGHT COMES ON FOR A VARIETY OF REASONS. A DIAGNOSTIC WOULD NEED TO BE RUN TO SEE WHAT CODES ARE COMING UP. ASSUMING THAT YOU HAVE DONE THIS AND MADE THE NECESSARY REPAIRS AT A SHOP, THEN THE SHOP SHOULD HAVE RESET THE CHECK ENGINE LIGHT. IF YOU DID THE REPAIRS YOURSELF YOU CAN DISCONNECT THE BATTERY(BOTH POSITIVE AND NEGATIVE TERMINALS) LET IT SIT FOR ABOUT 15-30 MINUTES. IF YOU RECONNECT THE BATTERY AND START THE ENGINE AND THE CHECK ENGINE LIGHT COMES BACK ON, THEN ALL OF THE NECESSARY REPAIRS HAVE NOT BEEN DONE.

All you have to do is disconnect the Negative battery terminal. It is not necessary to disconnect both. Once you've disconnected the terminal, let the car sit with no power for a few minutes, then reconnect the battery terminal. Your light should not come on, unless your engine sensors throw another code through your car's computer.

You DO NOT need to disconnect the battery terminals. All you have to do is turn the key to the "on" position (not running, but so that the radio etc. come on) and hold the trip reset button for about 15-20 seconds. KEEP IN MIND - that the light could be an indication of needed service as opposed to just coming on based on mileage.

To be clear, you must hold in the trip odometer reset button and THEN turn the key to the "on" position. If you prefer the battery disconnect method, be sure you have your radio code handy to re-initiate.
A couple things real quick. The MAINTENANCE LIGHT can be reset by holding down the odometer while turning the key. You can reset the CHECK ENGINE LAMP (technically the "MIL"...stands for "MALFUNCTION Indicator Lamp") by removing the power supply to the "ECU"...stands for "Engine Control Unit" or "Electronic Control Unit" depending on the manufacturer. This will clear all OBDII (On-Board Diagnostic II) codes without question (I'm assuming we are working on a 1996 or newer vehicle when I reference the OBDII, but even if not the codes will still be cleared.) This can be definitely be accomplished by removing the negative cable for a couple minutes and probably by removing the radio fuse like the manual says (in Hondas the two general share that constant power source for memory functions such as fault codes, radio stations, and whatnot.) If you are doing this to get through an emissions inspection where they hook up to the computer via the OBDII connector you'll have to wait anywhere from 5 to 50 miles, rarely longer, for the computer on a 2001 honda to run a series of diagnostic self checks on the different systems. Until that happens the inspection will not even initiate because, guess what, the EPA that mandates the OBDII system is not a bunch of idiots. They require manufacturers to meet specific requirements when programming these rascals and the self-checks (known technically as "Readiness Monitors") are one of them. For this type of inspection two (2) of these "Readiness Monitors" can be left unchecked when inspected on vehicles up to 1999, from 2000 on only one (1) "Readiness Monitor" is allowed to be unchecked for the inspection to initialize. Also, you should know that when a diagnostic query is made on that computer a block of time before and after the error is stored. This block contains all of the vehicles streaming telemetric data at the time of the fault(s). When you erase the code you erase that data too. This information is extremely helpful to anyone trying to diagnose your problem. They'll be able to tell if the engine was hot or cold, what your speed was, what RPM range, how much air and how much fuel the engine was using, the position of the throttle, how hot the air coming into the engine was, and a lot of other stuff that they'll definitely be billing you for should they have to take the time to recreate the problem to regather a large enough data set to make a proper diagnosis. Should you clear the codes, they'll be able to see that too, by looking at how many key starts/warm up cycles and how many "Readiness Monitor" checks have occurred since the car had the battery disconnected/codes cleared. The mechanic in me gets thoroughly irritated when Jiffy Lube or some parts store clears the code after checking it and not knowing how to fix it or even what it is besides what the scan tool in their hand or their computer tells them the description is...and not the slightest clue how to properly go behind the computer and manually check the systems (after all car computers can go bad too and report false positives). It'd be ashame to replace even just a hundred dollars worth of sensor(s) only to find out you actually needed a $200-$1200 computer [don't know the year]). When the customer comes to me with only a code in their hand and says I need this fixed, I just shake my head...okay, all you have is the code guess the entire system will have to be checked instead of keying in on specifics within the fault data set. This can be most frustrating to a mechanic, but the businessman in me just wants to laugh...SURE, Heck yeah, must be a tough one, if Joe Bob Partscounterman with his high dollar scan tool can't figure it out then we'll probably have to spend awhile on it (I really don't gouge in this scenario, but there are plenty who do...by the way Joe Bob's scan tool is what we call a generic scanner and probably cost the store about $300-$600...pretty expensive right, NOPE a shop that services your type car should have something a bit more specific to your car, such as our $2200+ Teradyne Tester w/ Honda software [1])...an hour & half or three later in real time, if you come out on the lucky side of this I tell you, you need a set of plugs and somebody misrouted a vacuum hose and you just wasted good money and hours of our time (mainly trying to get it to act up/set a code/etc.), and yes, believe it or not most mechanics do feel like it's a waste of time regardless of whether or not you're paying. On the flip side of this I come back to you and say yeah your torque converter is starting to come apart and clogged up some of the fluid passageways in your transmission which led to some of the other internal components burning up and we'll need to take it out, tear it down, and make a list...but it shouldn't be too bad though considering there doesn't seem to be any obvious symptoms, all the gears stills function so the hardparts should be good. At this point, the customer asks how much and I tell him around a $1000.00 since we caught it early. EARLY! they exclaim...$1000.00! they cry, but it doesn't feel like anything's wrong, and I tell them, "That's because ingenius Honda engineers programmed an alternate shift pattern for events such as this to save the hard parts. That way it can make it to the shop when the "MIL" comes on without doing huge amounts of damage running the bill up even higher for a full overhaul. Generally we'd just have to replace the torque converter for $400-$600, but this one must have come apart too fast and now we're dealing with internals," I say. IT'S AT THIS EXACT MOMENT THAT EVERY SHOP OWNER/MECHANIC/SERVICE WRITER/ETC. CAN SEE IT IN THEIR FACE, THEY WANT TO KICK THEMSELVES SO HARD IN THE . "WHY DID I PUT IT OFF! WHAT DOES A PARTS GUY AT SUCH & SUCH AUTO PARTS KNOW ABOUT THE INSIDE OF A TRANSMISSION, IF HE'S SO SMART HE'D BE DOING THIS NOT THAT" AND IT'S AT THIS EXACT MOMENT THAT EVERY ONE OF US CAN'T HELP BUT FEEL WHAT THE GERMANS CALL
"SCHADENFREUDE" (look it up). It's the truth, a human being in that scenario might outwardly show some empathy or at least professionlism, but inside the mischievous little voice in our heads is laughing it's rear-end off. Unless you personally unplugged something and right after that the light came on, don't disconnect the battery to reset the light, especially if this is for a state inspection and it's due this month. By the way I used the transmission example because I just dealt with this for fella on his Toyota 4Runner. He was so man he was going to take me to court because he thought I was trying to rip him off. I ended up making a deal with him. He'd take it to a dealer (I'm an independent), have them check it, and if I was wrong I'd give him a refund and reimburse him for the tow to the dealer. After the dealer looked at it and told him they didn't rebuild transmissions he was informed he'd need to buy another for well over $2,000. Needless to say we did that for him, and now his little around town beater (again his description) is in having an entire list (mostly his list LOL) done to it. It's actually pretty funny, in my experience it's situations like these that make the best customers.

All you do is take a key and push the little black indent part, and light goes back to green.
Fuse 13 worked like a charm. When I plugged it back in the headlights came on. I use auto-off and had to cycle them manually once. Check Engine is off. We'll give it 50-100 miles and see. THANKS

The best and only true way to reset a "check engine light" is not to go to Autozone or any where that has a scan tool or OBD II and have it turned off just fix the problem then a auto technican will turn it off or it will just come back on in a matter of time,

DON'T disconnect the battery or your just going to reset your 2001 honda memory and reset all emission monitors and have to go through a drive cycle and by time it resets its going to trigger the "engine light" agian. So that is the basics on a 2001 honda check engine light and turning off the check engine light.

My check engine light is on, 2000 Honda Accord, how do I reset the check engine light

2000 Accord Check Engine Light
The proper way, of course, is to repair the problem that caused it to come on. Another way I read on a website was to bring your car to an Autozone who will diagnose the problem and reset the light for you (and hope you buy the part to fix the problem). The quick and dirty way is to remove one of the battery cables for about 10 seconds (when the engine is off of course) then reconnect it.
-It is actually illegal for Autozone employees to just erase the engine code because they did it before and got sued by several people because they erased the engine code and then something went wrong with the car and the people got hurt in accidents. so they arent actually supposed to. I just had the EGR valve replaced on our 2000 Accord for the second time in two years. At least the price of the part has come down a huge amount in this time - from $300 to $70 - I suppose since it is a mass produced item since so many 2000 Accords have this problem. The last time the car had under 80Kmi so was under warranty but this time I paid an independent mechanic $170 which included the part. He said it is a poor design since even a speck of carbon in the EGR valve can cause it to stay open and the check engine light to come on. And he expects it will happen more often as the car gets older.
An guy who is a mechanic where I work said he thought it was best to clean out the deposits and a good product to do this was Marvel Mystery Oil (at Walmart for about $2 per pint). He said to use 4 oz in the gas tank when filling once per month for a few months. Besides possibly preventing the valve from fouling as often, this should also allow the car to run longer without needing premium fuel, according to him.
Every Honda I have had (and all I have had is Hondas for well over 20 years) has required midgrade fuel at about 120Kmi then premium at around 160Kmi to prevent it from pinging, no matter how many times I had it tuned, the plugs replaced, and the valves adjusted. The guy said the Marvel Mystery Oil will fix this, too - use it once per month until the premium fuel is no longer needed, which will take 3 to 4 months. I have no idea if this will work (it's a Mystery to me! ) but I will give it a try since otherwise this is still an excellent car.
Here is more input from others:
When I bought the 2000 Accord the salesmen told me that the Check Engine Light would come on at about 7K miles and not to be alarmed. This would be freindly a reminder to bring it in for the 1st service he said. Well just as the guy said at aproximatly 7K the check engine light came on. I called the service department and he insisted on me bringing it in so that they would perform the normal oil/filter changes then reset the light. After a bit I convinced the guy to tell me how to reset the light.
THIS IS HOW YOU RESET THE CHECK ENGINE LIGHT ON THE 99 HONDA ACCORD. 1. With the Car Off, Press and hold down the Odometer Trip Reset Button. 2. While still pressing the Trip Reset Button, Turn the Ignition Key half way on where all your oil, check engine lights etc.. turn on. Don't turn it as far as you would to normally start the car. Wait a few seconds and the Check engine light will turn off. 3. Turn the key back to the Off position and you're done. What a scam Honda has with the BS Check Engine Light.
In the repair book it says to remove the number 13 (clock back up) fuse on the passenger side while the ignition is off for 10 seconds. That should work according to the repair. If the light comes back on then u might have a problem.
Two different things being addressed on this whole topic. 1. To reset the "Maint Rqrd" light, you push and hold the reset knob and then engage the accessories via the the ignition switch. 2. To reset the "Check Engine" light, you need to either pull the fuse already mentioned in previous answers or disconnect the negative battery cable for a while. (Then make sure you know the Radio Code to reset your radio unit so it works).
The previous steps for resetting the service light and the check engine light also work on the 2000 Honda Accord. Excellent insights! Thank you! Just a note for the novice repairmen: the fuse panel is inside the passenger door on the side of the dash assembly (not under the hood).
First you need to determine if it is a "check engine light" or a "maintainance required light" A check engine light is usually an amber light with the picture of an engine with a line through it. If this light is on you should take it to a QUALIFIED REPAIR TECHNICIAN who is capable of working on a Honda. They have all the tools needed to diagnose your repair.If it is a maint. required light new Honda"s are reset by holding the trip reset button down and turn the ignition switch to "on" while holding the button. wait until the light goes out (about 15 seconds) before releasing the button. This light will come on every 7500 miles.
AS YOU KNOW THE CHECK ENGINE LIGHT COMES ON FOR A VARIETY OF REASONS. A DIAGNOSTIC TEST WOULD NEED TO BE RUN TO SEE WHAT CODES ARE COMING UP. ASSUMING THAT YOU HAVE DONE THIS AND MADE THE NECESSARY REPAIRS AT A SHOP, THEN THE SHOP SHOULD HAVE RESET THE CHECK ENGINE LIGHT. IF YOU DID THE REPAIRS YOURSELF YOU CAN DISCONNECT THE BATTERY(BOTH POSITIVE AND NEGATIVE TERMINALS) LET IT SIT FOR ABOUT 15-30 MINUTES. IF YOU RECONNECT THE BATTERY AND START THE ENGINE AND THE CHECK ENGINE LIGHT COMES BACK ON, THEN ALL OF THE NECESSARY REPAIRS HAVE NOT BEEN DONE.
All you have to do is disconnect the Negative battery terminal. It is not necessary to disconnect both. Once you've disconnected the terminal, let the car sit with no power for a few minutes, then reconnect the battery terminal. Your light should not come on, unless your engine sensors throw another code through your car's computer.
You DO NOT need to disconnect the battery terminals. All you have to do is turn the key to the "on" position (not running, but so that the radio etc. come on) and hold the trip reset button for about 15-20 seconds. KEEP IN MIND - that the light could be an indication of needed service as opposed to just coming on based on mileage.
To be clear, you must hold in the trip odometer reset button and THEN turn the key to the "on" position. If you prefer the battery disconnect method, be sure you have your radio code handy to re-initiate.
A couple things real quick. The MAINTENANCE LIGHT can be reset by holding down the odometer while turning the key. You can reset the CHECK ENGINE LAMP (technically the "MIL"...stands for "MALFUNCTION Indicator Lamp") by removing the power supply to the "ECU"...stands for "Engine Control Unit" or "Electronic Control Unit" depending on the manufacturer. This will clear all OBDII (On-Board Diagnostic II) codes without question (I'm assuming we are working on a 1996 or newer vehicle when I reference the OBDII, but even if not the codes will still be cleared.) This can be definitely be accomplished by removing the negative cable for a couple minutes and probably by removing the radio fuse like the manual says (in Hondas the two general share that constant power source for memory functions such as fault codes, radio stations, and whatnot.) If you are doing this to get through an emissions inspection where they hook up to the computer via the OBDII connector you'll have to wait anywhere from 5 to 50 miles, rarely longer, for the computer to run a series of diagnostic self checks on the different systems. Until that happens the inspection will not even initiate because, guess what, the EPA that mandates the OBDII system is not a bunch of idiots. They require manufacturers to meet specific requirements when programming these rascals and the self-checks (known technically as "Readiness Monitors") are one of them. For this type of inspection two (2) of these "Readiness Monitors" can be left unchecked when inspected on vehicles up to 1999, from 2000 on only one (1) "Readiness Monitor" is allowed to be unchecked for the inspection to initialize. Also, you should know that when a diagnostic query is made on that computer a block of time before and after the error is stored. This block contains all of the vehicles streaming telemetric data at the time of the fault(s). When you erase the code you erase that data too. This information is extremely helpful to anyone trying to diagnose your problem. They'll be able to tell if the engine was hot or cold, what your speed was, what RPM range, how much air and how much fuel the engine was using, the position of the throttle, how hot the air coming into the engine was, and a lot of other stuff that they'll definitely be billing you for should they have to take the time to recreate the problem to regather a large enough data set to make a proper diagnosis. Should you clear the codes, they'll be able to see that too, by looking at how many key starts/warm up cycles and how many "Readiness Monitor" checks have occurred since the car had the battery disconnected/codes cleared. The mechanic in me gets thoroughly irritated when Jiffy Lube or some parts store clears the code after checking it and not knowing how to fix it or even what it is besides what the scan tool in their hand or their computer tells them the description is...and not the slightest clue how to properly go behind the computer and manually check the systems (after all car computers can go bad too and report false positives). It'd be ashame to replace even just a hundred dollars worth of sensor(s) only to find out you actually needed a $200-$1200 computer [don't know the year]). When the customer comes to me with only a code in their hand and says I need this fixed, I just shake my head...okay, all you have is the code guess the entire system will have to be checked instead of keying in on specifics within the fault data set. This can be most frustrating to a mechanic, but the businessman in me just wants to laugh...SURE, Heck yeah, must be a tough one, if Joe Bob Partscounterman with his high dollar scan tool can't figure it out then we'll probably have to spend awhile on it (I really don't gouge in this scenario, but there are plenty who do...by the way Joe Bob's scan tool is what we call a generic scanner and probably cost the store about $300-$600...pretty expensive right, NOPE a shop that services your type car should have something a bit more specific to your car, such as our $2200+ Teradyne Tester w/ Honda software [1])...an hour & half or three later in real time, if you come out on the lucky side of this I tell you, you need a set of plugs and somebody misrouted a vacuum hose and you just wasted good money and hours of our time (mainly trying to get it to act up/set a code/etc.), and yes, believe it or not most mechanics do feel like it's a waste of time regardless of whether or not you're paying. On the flip side of this I come back to you and say yeah your torque converter is starting to come apart and clogged up some of the fluid passageways in your transmission which led to some of the other internal components burning up and we'll need to take it out, tear it down, and make a list...but it shouldn't be too bad though considering there doesn't seem to be any obvious symptoms, all the gears stills function so the hardparts should be good. At this point, the customer asks how much and I tell him around a $1000.00 since we caught it early. EARLY! they exclaim...$1000.00! they cry, but it doesn't feel like anything's wrong, and I tell them, "That's because ingenius Honda engineers programmed an alternate shift pattern for events such as this to save the hard parts. That way it can make it to the shop when the "MIL" comes on without doing huge amounts of damage running the bill up even higher for a full overhaul. Generally we'd just have to replace the torque converter for $400-$600, but this one must have come apart too fast and now we're dealing with internals," I say. IT'S AT THIS EXACT MOMENT THAT EVERY SHOP OWNER/MECHANIC/SERVICE WRITER/ETC. CAN SEE IT IN THEIR FACE, THEY WANT TO KICK THEMSELVES SO HARD IN THE . "WHY DID I PUT IT OFF! WHAT DOES A PARTS GUY AT SUCH & SUCH AUTO PARTS KNOW ABOUT THE INSIDE OF A TRANSMISSION, IF HE'S SO SMART HE'D BE DOING THIS NOT THAT" AND IT'S AT THIS EXACT MOMENT THAT EVERY ONE OF US CAN'T HELP BUT FEEL WHAT THE GERMANS CALL "SCHADENFREUDE" (look it up). It's the truth, a human being in that scenario might outwardly show some empathy or at least professionlism, but inside the mischievous little voice in our heads is laughing it's rear-end off. Unless you personally unplugged something and right after that the light came on, don't disconnect the battery to reset the light, especially if this is for a state inspection and it's due this month. By the way I used the transmission example because I just dealt with this for fella on his Toyota 4Runner. He was so man he was going to take me to court because he thought I was trying to rip him off. I ended up making a deal with him. He'd take it to a dealer (I'm an independent), have them check it, and if I was wrong I'd give him a refund and reimburse him for the tow to the dealer. After the dealer looked at it and told him they didn't rebuild transmissions he was informed he'd need to buy another for well over $2,000. Needless to say we did that for him, and now his little around town beater (again his description) is in having an entire list (mostly his list LOL) done to it. It's actually pretty funny, in my experience it's situations like these that make the best customers.
All you do is take a key and push the little black indent part, and light goes back to green.
Fuse 13 worked like a charm. When I plugged it back in the headlights came on. I use auto-off and had to cycle them manually once. Check Engine is off. We'll give it 50-100 miles and see. THANKS
The best and only true way to reset a "check engine light" is not to go to Autozone or any where that has a scan tool or OBD II and have it turned off just fix the problem then a auto technican will turn it off or it will just come back on in a matter of time,
DON'T disconnect the battery your just going to reset your vehicles memory and reset all emission monitors and have to go through a drive cycle and by time it resets its going to trigger the "engine light" agian. Especially on a 2000 Honda accord Check engine light is on, reset or turn off check engine light

Friday, September 11, 2009

How do i know if the shock, shocks are bad on my Lexus

When it comes to Lexus shocks and suspension, many people are confused as to what the shocks on their vehicle do. The job of the shock is to slow down and damp the movement of the body on the wheel. The real function of shock absorbers are to:


1) Prevent bottoming, that is slowing down the compression of the spring and create lifting force on the wheel.

2}Prevent the tires from bouncing up and down on bumps and absorb some of the energy.

3)Keep the vehicle from bouncing up and down on the springs before settling down.
I’ve put together a few simple tests you can do even if you have no mechanical knowledge about your Lexus at all.

The same principle applies for strut suspension.

1}Push your weight down on the front or rear of your Lexus and release .The vehicle should bounce up and settle down. If it continues to bounce the shocks are worn out.

2)Drive over a small bump at a speed of 20 mph and the wheel should lift to it and settle down without a thud.(the thud is the rubber snubber)

3)At 60 mph the vehicle should rise and fall quickly over a dip, then stabilize itself after 2 rebounds..If it does not the vehicle will feel like it is floating and this makes the steering very unstable.

4)On rough roads does your vehicle shake and vibrate after you go a short distance? Well if it does, it is because the oil in the shock is overheating and starting to foam. That problem can be corrected with a nitrogen gas shock.

5)The last is to look at the shock or strut and see if it is leaking oil, if so it has no compression or rebound.
If your Lexus failed any of these tests either the shocks are worn out are mismatched for your vehicle. Some of the best shocks and struts on the market are Bilstein’s Monroe, and KYBs . And remember that maintaining the shocks and or struts on your Lexus is very important to the handling and tire wear on your vehicle.

How do i know if the shock, shocks are bad on my Hyundai

When it comes to Hyundai shocks and suspension, many people are confused as to what the shocks on their Hyundai do. The job of the shock is to slow down and damp the movement of the body on the wheel. The real function of shock absorbers are to:

 1) Prevent bottoming, that is slowing down the compression of the spring and create lifting force on the wheel.

2}Prevent the tires from bouncing up and down on bumps and absorb some of the energy.

3)Keep the vehicle from bouncing up and down on the springs before settling down.

I’ve put together a few simple tests you can do even if you have no mechanical knowledge about your Hyundai at all. The same principle applies for strut suspension.
1}Push your weight down on the front or rear of your Hyundai and release .The vehicle should bounce up and settle down. If it continues to bounce the shocks are worn out.

2)Drive over a small bump at a speed of 20 mph and the wheel should lift to it and settle down without a thud.(the thud is the rubber snubber)

3)At 60 mph the vehicle should rise and fall quickly over a dip, then stabilize itself after 2 rebounds..If it does not the vehicle will feel like it is floating and this makes the steering very unstable.

4)On rough roads does your vehicle shake and vibrate after you go a short distance? Well if it does, it is because the oil in the shock is overheating and starting to foam. That problem can be corrected with a nitrogen gas shock.

5)The last is to look at the shock or strut and see if it is leaking oil, if so it has no compression or rebound.
If your Hyundai failed any of these tests either the shocks are worn out are mismatched for your vehicle. Some of the best shocks and struts on the market are Bilstein’s Monroe, and KYBs . And remember that maintaining the shocks and or struts on your Hyundai is very important to the handling and tire wear on any Hyundai.