The first indication that it is time for a tune up is when gas mileage begins to worsen.
You should always keep running tabs that show the average miles per gallon your vehicle is achieving. You can check the average mileage that you are getting and if the figures have begun to drop 10-15% there is a good chance that your automobile would benefit from a little TLC at a garage.
Of course there are some additional signs that can give you clues that let you know if your car could use a tune-up. When you perform routine tune-ups on a vehicle you are rewarded with better mileage and performance, but sometimes some small adjustments can be needed in between scheduled maintenance visits.
There are other reasons besides a tune up that could be the cause of many automotive woes, but this procedure will often clear up minor problems and it is relatively inexpensive.
Here are some of the top problems that occur in cars that are begging for a tune-up:
Misfiring of the engine becomes more frequent
Unusually rough running, engine coughs and sputters
Fast Idling is noticeable, especially when the engine is warm
Low power is obvious, especially on hills or when accelerating
Rough idling can be felt by the driver and passengers
Engine pings and knocks
Black smoke from the exhaust pipe
Engine continues to run for a few seconds after the car is turned off
Engine hesitation
Problems starting the engine
Usually you will notice more than one of these signs, and the more of them that are present, the greater the chance that you should take your car in for a check up soon. Some people have cars that may occasionally exhibit one or two of these problems; this is not necessarily an indicator that a tune up is in order. It is when these types of automotive symptoms suddenly occur that the alarm buzzers go off.
If you have been driving a car that has always had a little engine ping that you are used to hearing it may be very normal. You can ask a mechanic to check it out for you, but if your vehicle has already had an extensive work up and it is tuned to perfection, another tune up will not be necessary. There are some automobiles that have idiosyncrasies and if the problem is not major then you should not become overly concerned.
Proper maintenance will keep your car running longer and stay in better shape.
you can easily see that when you call around for an estimate you can get some pretty dramatic price differences. Most larger shops and all dealers that I am aware of will charge an hourly price for each job that is listed in a shop hourly manual. For example your car tune up might have an estimated repair or replacement time of four hours in the shop manual. This time is calculated using the shop hourly rate {i.e., 4 x $60}. Pretty straight forward right? Not all the time.So what do you get for the four hours of labor? If you call my shop and ask for a car tune up price we automatically figure in the price a fuel filter, spark plugs, air filter, PCV filter, and distributor ignition rotor plus all applicable labor charges. So my car tune up price would probably be much higher than a shop that only replaces spark plugs as their auto tune up package. You need to make sure you are comparing apples to apples when you are calling around for prices.Some shops that I know in my area purposely give low ball telephone estimates just to get you in the door. Example: You call to get a price for a new radiator installed. Does the estimate include new antifreeze, a new radiator cap and taxes? I would automatically figure these items in to my estimate, not only because I want to do a nice turn key job, but also I don't want to have to sell you parts later on that I already know you will need. For this reason, my phone estimates can be higher than some of my competitors, but your final bill might be lower. There are also different brands of shop manuals on the market, so the GM dealer would be using a different labor estimating guide than my shop and most independent shops would be using. Not only would these guides possibly give different replacement times, but they could also classify an auto tune up differently like in my example above. So the shop that you found only charged you for the time they actually spent working on the car? So is that a better deal? Maybe not, if all they did was replace spark plugs and call it a car tune-up. Just for grins you should call the dealer back and ask them how much they charge just for spark plugs. What if this shop has a slower mechanic, or deliberately takes longer to do the work just to rack up more time on the clock?On a different note, as a servicewriter, I would want to know why you are requesting a car tune up in the first place. What I have found is that if the car runs poorly or differently than normal, the customer often automatically asks for a car tune up. Cars of today are very sophisticated and full of computers and sensors that can cause your car to act strangely. So a tune up might not fix the problem, and a proper diagnosis from the mechanic could be beneficial
Monday, August 24, 2009
Replacing a head gasket is not for the beginner
Understanding why a relatively inexpensive head gasket costs so much to replace means first realizing what it sits between. In the engine block are pistons that travel up and down in cylinder bores. The pistons are connected to rods, which in turn are connected to a spinning crankshaft from which the vehicle takes its power. Bolted to the top of the engine is the cylinder head. Inside the cylinder head are valves that open and close to let air and fuel into the cylinders and expel the spent exhaust gas.
The head gasket is compressed between the engine block and the cylinder head. The head gasket seals in the internal combustion process and also keeps coolant and oil from mixing together as the two fluids travel from the engine block to the cylinder head. Head gaskets themselves are not very expensive. What ends up costing big money is getting to it. Removing and replacing the head gasket means undertaking the major operation of removing an engine's head. Boiling Over A head gasket can fail for a number of reasons, none of them good. Engine overheating is the most popular culprit. The metal of the engine block and head expands beyond limits during overheating. This expansion can pinch the head gasket to the point where it will fail. The next major causes of head gasket failure are engine pre-ignition or detonation. The crux of these two conditions is out-of-time combustion occurring in the cylinders. Internal combustion is supposed to occur with both valves closed and with the piston at the top of its power stroke. Out of time combustion puts extra strain on the valves, pistons, and head gasket. Ironically, engine overheating can also increase the likelihood of pre-ignition and detonation. The sound of an engine pinging or knocking is the insidious sound of damage. Head Surgery Head gasket replacement is not a job for the average do-it-yourselfer. While a head gasket expiring due to old age is rare, it usually means everything else is worn out to the point of replacement as well. Cracking the head off the engine and peering inside may reveal that everything else got fully cooked, too. The best way to prevent head gasket failure is to keep the cooling system in top working order and make sure the engine is in tune and running correctly. The failure of a $5 thermostat or $3 coolant hose can cause thousands of dollars in engine damage in a hurry. The following are a few general tips for replacing a head gasket. For vehicle specific head gasket replacement procedures always consult a service manual.
Step 1 - Getting down to the head gasket can be an involved process. Always mark and index everything before removal. In this case, it was easier to remove the exhaust manifold, head, and intake as a unit. A service manual is the first and most important tool in the toolbox.
Step 2 - Check the head and block for flatness. A machined straight edge across the surface and feeler gauge will reveal all. The service manual will provide specifications. Blocks or heads out of specification must be sent out to the machine shop and be repaired. The machine shop will also be able to check for cracks.
Step 3 - Prepare the surface. Never use anything that will remove metal. Be careful not to scratch the deck of the block or mounting surface of the head. While it may seem like a good idea to use a scrubber pad connected to a power tool, the surface irregularities created can cause sealing problems down the road.
Step 4 - Chase the head bolt or stud holes with a tap or thread chaser to remove any crud and prepare the threads. Use compressed air to blow out any stragglers. Correct head bolt torque is of utmost importance. Any interference can throw off the torque readings.
Step 5 - Pre-fit the head gasket in the correct orientation. Never use sealant unless specifically required by the manufacturer. Head gaskets that require sealant will usually come so equipped. The service manual will outline sealant locations and requirements.
Step 6 - Correct bolt tightening sequence and torque is key to proper head gasket sealing. Use new bolts if required. Coat head bolt threads with some engine oil before installing. Always follow tightening sequence and torque instructions to the last detail.
Replacing My alternator.
Over the past several years, the reliability of vehicle charging systems has certainly improved. However, if you own an older vehicle, sooner or later a warning light on your dashboard is going to tell you that the alternator has failed. Alternators seldom experience a total failure, but the relatively low cost of completely re-conditioned units has virtually eliminated any need for the do-it-yourselfer to try to repair an alternator - they are simply replaced. Starting in the early 1960s, alternators began to replace generators as the standard means of charging your vehicle's battery. Like generators, alternators are belt driven from the crankshaft pulley of the engine. Today, two basic types of drive belts are used: The V-belt and the serpentine (ribbed) belt. The V-belt belt design predominated up to the late 1980s. Today, most vehicles use a ribbed, serpentine belt. Since serpentine-belt-driven alternators vary substantially in how the belt is held in "tension," replacement techniques vary quite a bit. This DIY article will concentrate only on the older, V-belt driven systems. When replacing the alternator, you will need to decide between purchasing a new alternator from your vehicle's dealership or buying a rebuilt unit from an auto parts store. The cost difference is substantial, so weigh the pluses and minuses before you buy.
SetupPark your vehicle inside or outside in a well-lighted, well-ventilated, level area. Locate the alternator under the hood in the engine compartment. Here are some hints:
The alternator is always belt-driven off the front of the engine, even on transverse-engine, front-wheel-drive vehicles.
The alternator has electrical wires running to it.
Most alternators are made of aluminum.
Most alternators have a small, built-in fan visible behind the belt pulley. Check the owner's manual for more information. In many cases, you'll find a diagram of the engine compartment with the alternator identified. Once you have located your vehicle's alternator, carefully note how it is attached to the engine. There should be two points where the alternator is bolted to the engine - one which allows the alternator to swivel or swing in order to vary the tension on the V-belt, the other, usually a curved bracket with a long slotted hole in it, that limits the amount of swivel and locks the alternator in place. Make sure that you can reach these bolts with either socket or combination wrenches. In many cases you must use two wrenches - one on each side of the bolt - in order to loosen it. If the bolts/nuts appear to be corroded, test your ability to free them.
Point of No Return If you cannot locate the alternator, reach the attachment bolts or free the nuts, stop and let a professional Technician handle the job. Note: This DIY task really benefits from having a second vehicle and/or another set of hands. More on this later.
Tools RequiredBasic hand tools are needed for this job:
Combination wrenches
Socket wrenches
Vise grips
A large, flat-bladed screwdriver
MaterialsOther than a new or rebuilt alternator, the only other material required is a new V-belt, masking tape (or similar) and a marker pen. You may also need some fine-grit sandpaper if the nuts and washers on the alternator are corroded. Since you have to loosen the V-belt when you replace an alternator, unless the belt is relatively new, it makes good sense to replace it. The alternator and V-belt can be purchased at your car's dealership or, for most cars, at auto parts stores. When you go to the parts counter, you will need to provide the year, make, model, engine displacement, and even information about options on your vehicle, such as power steering and air conditioning. All this information is needed since V-belt length varies depending upon what engine accessory is being driven. Here's where it's beneficial to have another running vehicle or a friend's car. Ideally, you should remove the old alternator and V-belt from your vehicle and take them to the parts counter. In this way, you can ensure that the replacements match perfectly. The JobPark your car (inside or outside) with plenty of space to work around each side of the engine compartment.
Disconnect the negative terminal of the vehicle's battery. If you don't do this, some of the wires that run to the back of the alternator can short out if they touch the car body or engine. Disconnecting the battery will protect you and the electrical circuits of the vehicle.
Loosen the two bolts that hold the alternator in place. If these bolts have nuts on the opposite side, you may have to use two wrenches on one or both of these bolts. Do not remove the bolts yet.
Once you have loosened the bolts, try to rotate the alternator to loosen the slack in the V-belt - rotate it towards the direction that the V-belt runs. Just move the alternator enough to remove the V-belt from the alternator pulley.
If you are replacing the V-belt at this time, take the belt off the rest of the pulleys on the engine. This may take some patience and involve a couple of scratched knuckles. You may have to work the belt over the radiator fan and shroud.
Remove the electrical wires that are attached to the back of the alternator. Sometimes they are held in place by plugs with wire retainers; some are held on with nuts and washers. Using the masking tape and marker pen, mark the location of each wire that you remove so that you install them in the same place on the replacement alternator. Make a diagram of the wire locations on the back of the alternator, and write down the color of the wire or plug that goes to each location. Check that the replacement alternator has the same type and location of fittings for the wires. You may have to use the old nuts and washers on the replacement unit. If so, clean them and even give them a quick wipe with some fine sandpaper.
Finish loosening the bolts that hold the alternator in place and remove these bolts. Remove the alternator and set it aside.
Take the replacement alternator and, if not already done, feed the bolts into place within the alternator housing. Position the alternator so that you can start to feed the bolts into the holes on the two engine brackets. Loosely place the nuts and washers on the back of the bolts. Make sure that you position the loosely held alternator so that it won't swing down and hit your knuckles!
Install the new V-belt on the engine pulleys first (and on any other engine accessory that it drives) and finally, on the alternator pulley. If the new V-belt is not the right size, you can temporarily re-use the old belt. You can visit the parts counter again to get the correct size, and install a new V-belt at a later time.
Now you need to position the alternator in the correct place and begin to get the right tension V-belt before you tighten the bolts that hold the alternator in place. This can be frustrating, particularly if you are working alone, but there is a way to simplify the job. First, hand-tighten the bolt/nut that holds the alternator to the engine - you still need to rotate the alternator to the correct position on the slotted bracket. Then rotate the alternator until it is holding the V-belt in place with no obvious slack. Now take a pair of vise grips and adjust the jaws so that they can tighten on the slotted bracket. Position the vise grips on the slotted bracket just behind the "ear" on the alternator housing - in other words, let the vise grips be your extra set of hands holding the alternator against the V-belt in the proper position. In effect, you are using the vise grips as a "stop" on the slotted bracket.
By just moving the vise grips slightly you can now add the right tension to the V-belt. First, as noted above, make sure that there is no discernible slack in the V-belt. Then pull the alternator about 1/2 to 3/4 inch further in order to pull the V-belt tighter (or, stated another way, apply about 20 pounds of force against the belt). With the alternator now held in this new position, reposition the vise grips on the slotted bracket to hold the alternator in place. At this point, you can take your time and tighten all the bolts that hold the alternator in place.
Remove the vise grips, and replace all of the electrical wires on the back of the alternator. Use your wiring diagram as a reference.
Re-connect the battery negative terminal.
Taking all appropriate safety precautions, start the engine. First, ensure that the ignition warning light in the instrument panel goes out after the engine has been started. Then listen to the belt. If you hear any belt squeal, the belt is too loose. Shut off the engine, and try to further tighten the alternator on the slotted bracket. Be careful not to over-tension the belt. Too much pressure on the engine accessories can ruin the bearings of the water pump or alternator in a relatively short time.
Should I flush my transmission fluid?
If it is a newer vehicle with less than 80,000 miles, I would recommend regular servicing of the transmission every 25,000 miles, including changing the fluid and internal filter. It is important that you maintain the transmission early on in the life of the vehicle, or you could set yourself up for real trouble if you change the transmission fluid later on (discussed below).
Regular servicing of the transmission can provide longer life expectancy, smoother shifting, and increased performance.
Some fast lube places service transmissions by "flushing" the transmission using a special machine that acts like a blood transfusion machine. It pumps out the transmission fluid, filters it, then recirculates it back into the transmission several times until the fluid is clean. I have mixed emotions about this procedure.
Yes, I will agree that with this machine it is possible to remove more of the old dirty fluid from inside the transmission than the conventional method of removing the transmission pan, draining the fluid and replacing the internal filter, but I feel very strongly that the internal filter should also be changed. Metal and plastic debris become lodged in the filter, and I have seen the filter itself break down and become compacted to the point that it restricts fluid flow.
If the fluid has become contaminated with water or some other foreign fluid, then I would recommend the flush method, but for regular maintenance I prefer the tried-and-true way of draining the old fluid and replacing the filter. If you have any doubt as to what method would be right for your vehicle, seek the advice of a qualified transmission shop.
I really feel the reason these fast lube places have adopted this flush method is because it lessons the chance of "mechanic error" while removing the transmission pan and filter, not necessarily because it is the best way to perform transmission maintenance.
Higher Mileage Cars
If your vehicle has high mileage (> 80,000 miles) and regular transmission servicing has been preformed as recommended, seek the advice of a qualified transmission shop if you experience a problem such as:
* Slipping
* Hard or erratic shifting
* Slow to shift when engine is cold (first thing in the morning)
If your vehicle has high mileage (> 80,000 miles) and the transmission has not been maintained, I would not recommend replacing the fluid and filter. The fluid that has been in the transmission all this time has become dirty and gritty. This gritty fluid is actually providing needed friction for the worn internal parts of the transmission.
Changing the fluid and replacing the filter would remove this friction that the internal transmission parts have become dependent on. If you have not been regularly maintaining the transmission throughout the life of the car, you might actually be doing more harm than good if you replace the transmission fluid at this point. For example, putting new clean slick transmission fluid in an older high mileage vehicle could cause the transmission to slip.
If you are not experiencing a problem, have over 80,000 miles on your car, and have not kept up regular maintenance on the transmission, my advice would be to leave the transmission fluid and filter alone. If you are experiencing a transmission problem like those listed above, seek the advice of a qualified transmission shop before allowing your regular mechanic to service the transmission.
I learned about this problem several years ago...the hard way. We had two cars in our shop with these "minor" transmission symptoms that I have listed above, and both of them had to be towed out to the transmission shop after servicing. The old fluid was gritty due to metal shavings caused by normal internal wear and tear on the transmission clutches and was acting like liquid sandpaper.
This "sandpaper" was producing the friction needed for the transmission to pull itself. When we changed the filter and replaced the old fluid with new fluid, the clutches inside the transmission had nothing to grab on to. Sometimes even the best of us learn lessons the hard (and expensive) way. Flushing your transmission is vital to the transmission performance, But you must flush it regularly, once the fluid is damaged, it is best not to flush your transmission.
Wednesday, August 19, 2009
1998-2000 Mercedes Benz CLK320 Oxygen Sensor Bosch Mercedes Benz Oxygen Sensor
1998-2000 Mercedes Benz CLK320 Oxygen Sensor Bosch Mercedes Benz Oxygen Sensor 15088 98 99 00
bosch oe type super class oxygen sensor 4-wire 31.9 in. wire length heated; constructed of premium ceramic technology that incorporates zirconium or titania and yttrium for superior protection against mechanical and thermal shock; its patented catalytically activated fine particle filter prevents contamination for extended life and ensures precise voltage to the engines emission control computer while a second filter doubles protection against exhaust gas contamination thereby increasing sensor life; prevents premature failure of the catalytic converter; snug fitting oe-style silicone boots ensure proper fit function and appearance; rigorously tested for perfect performance while saving money in fuel costs; direct plug-in no cutting or splicing required auto parts warehouse has extensive bosch oxygen sensor catalogs.we are now offering free shipping on all bosch oxygen sensor orders over $50.00. our secure bosch oxygen sensor catalog is available every hour of everyday. shop with confidence for all your bosch oxygen sensor needs. bosch oxygen sensor are in stock and available today. save upto 60% off dealer price on your next bosch oxygen sensor purchase. our online catalog contains a wide selection of the oem and aftermarket parts you need at unbeatable prices. 1998-2000 Mercedes Benz CLK320 Oxygen Sensor Bosch Mercedes Benz Oxygen Sensor.
1995-1998 Acura TL Oxygen Sensor Walker Products Acura Oxygen Sensor
1995-1998 Acura TL Oxygen Sensor Walker Products Acura Oxygen Sensor 25024097 95 96 97 98
walker products oxygen sensor 4-wire a high quality direct fit oe replacement oxygen sensor; improves car s engine response and gas mileage; effectively lowers emissions upon replacing its tired old oxygen sensor; exceeds oe specifications and test requirements; oe part number 36532p1ra01 auto parts warehouse has extensive walker products oxygen sensor catalogs.we are now offering free shipping on all walker products oxygen sensor orders over $50.00. our secure walker products oxygen sensor catalog is available every hour of everyday. shop with confidence for all your walker products oxygen sensor needs. walker products oxygen sensor are in stock and available today. save upto 60% off dealer price on your next walker products oxygen sensor purchase. our online catalog contains a wide selection of the oem and aftermarket parts you need at unbeatable prices. 1995-1998 Acura TL Oxygen Sensor Walker Products Acura Oxygen Sensor.
1985-1986 BMW 535i Oxygen Sensor Bosch BMW Oxygen Sensor
>bosch oe type super class oxygen sensor 3-wire 19.7 in. wire length heated; constructed of premium ceramic technology that incorporates zirconium or titania and yttrium for superior protection against mechanical and thermal shock; its patented catalytically activated fine particle filter prevents contamination for extended life and ensures precise voltage to the engines emission control computer while a second filter doubles protection against exhaust gas contamination thereby increasing sensor life; prevents premature failure of the catalytic converter; snug fitting oe-style silicone boots ensure proper fit function and appearance; rigorously tested for perfect performance while saving money in fuel costs; direct plug-in no cutting or splicing required auto parts warehouse has extensive bosch oxygen sensor catalogs.we are now offering free shipping on all bosch oxygen sensor orders over $50.00. our secure bosch oxygen sensor catalog is available every hour of everyday. shop with confidence for all your bosch oxygen sensor needs. bosch oxygen sensor are in stock and available today. save upto 60% off dealer price on your next bosch oxygen sensor purchase. our online catalog contains a wide selection of the oem and aftermarket parts you need at unbeatable prices. 1985-1986 BMW 535i Oxygen Sensor Bosch BMW Oxygen Sensor
2000-2005 Mercedes Benz E320 Oxygen Sensor Walker Products Mercedes Benz Oxygen Sensor
2000-2005 Mercedes Benz E320 Oxygen Sensor Walker Products Mercedes Benz Oxygen Sensor 25024468 00 01 02 03 04 05
walker products oxygen sensor 4-wire a high quality direct fit oe replacement oxygen sensor; improves car s engine response and gas mileage; effectively lowers emissions upon replacing its tired old oxygen sensor; exceeds oe specifications and test requirements; oe part number 15407417 auto parts warehouse has extensive walker products oxygen sensor catalogs.we are now offering free shipping on all walker products oxygen sensor orders over $50.00. our secure walker products oxygen sensor catalog is available every hour of everyday. shop with confidence for all your walker products oxygen sensor needs. walker products oxygen sensor are in stock and available today. save upto 60% off dealer price on your next walker products oxygen sensor purchase. our online catalog contains a wide selection of the oem and aftermarket parts you need at unbeatable prices. 2000-2005 Mercedes Benz E320 Oxygen Sensor Walker Products Mercedes Benz Oxygen Sensor.
walker products oxygen sensor 4-wire a high quality direct fit oe replacement oxygen sensor; improves car s engine response and gas mileage; effectively lowers emissions upon replacing its tired old oxygen sensor; exceeds oe specifications and test requirements; oe part number 15407417 auto parts warehouse has extensive walker products oxygen sensor catalogs.we are now offering free shipping on all walker products oxygen sensor orders over $50.00. our secure walker products oxygen sensor catalog is available every hour of everyday. shop with confidence for all your walker products oxygen sensor needs. walker products oxygen sensor are in stock and available today. save upto 60% off dealer price on your next walker products oxygen sensor purchase. our online catalog contains a wide selection of the oem and aftermarket parts you need at unbeatable prices. 2000-2005 Mercedes Benz E320 Oxygen Sensor Walker Products Mercedes Benz Oxygen Sensor.
1995-1998 Acura TL Oxygen Sensor Bosch Acura Oxygen Sensor
>bosch oe type super class oxygen sensor 4-wire 29.3 in. wire length heated; constructed of premium ceramic technology that incorporates zirconium or titania and yttrium for superior protection against mechanical and thermal shock; its patented catalytically activated fine particle filter prevents contamination for extended life and ensures precise voltage to the engines emission control computer while a second filter doubles protection against exhaust gas contamination thereby increasing sensor life; prevents premature failure of the catalytic converter; snug fitting oe-style silicone boots ensure proper fit function and appearance; rigorously tested for perfect performance while saving money in fuel costs; direct plug-in no cutting or splicing required auto parts warehouse has extensive bosch oxygen sensor catalogs.we are now offering free shipping on all bosch oxygen sensor orders over $50.00. our secure bosch oxygen sensor catalog is available every hour of everyday. shop with confidence for all your bosch oxygen sensor needs. bosch oxygen sensor are in stock and available today. save upto 60% off dealer price on your next bosch oxygen sensor purchase. our online catalog contains a wide selection of the oem and aftermarket parts you need at unbeatable prices. 1995-1998 Acura TL Oxygen Sensor Bosch Acura Oxygen Sensor
1999-2000 Mazda Miata Oxygen Sensor Bosch Mazda Oxygen Sensor
1999-2000 Mazda Miata Oxygen Sensor Bosch Mazda Oxygen Sensor W0133-1604338 99 00
. auto parts warehouse has extensive bosch oxygen sensor catalogs.we are now offering free shipping on all bosch oxygen sensor orders over $50.00. our secure bosch oxygen sensor catalog is available every hour of everyday. shop with confidence for all your bosch oxygen sensor needs. bosch oxygen sensor are in stock and available today. save upto 60% off dealer price on your next bosch oxygen sensor purchase. our online catalog contains a wide selection of the oem and aftermarket parts you need at unbeatable prices. 1999-2000 Mazda Miata Oxygen Sensor Bosch Mazda Oxygen Sensor
What does an oxygen sensor do? How does it work?
 Image via Wikipedia
Oxygen Sensor (O2 Sensor)
The Oxygen Sensor, also known as the O2 Sensor is the component responsibly for delivering exhaust information to a vehicle's emissions computer. Most late model vehicles will be equipped with both a pre-CAT oxygen sensor and a post-CAT oxygen sensor.
The Bosch O2 sensor sends an electric signal directly in proportion to the oxygen content in your vehicle's exhaust stream. The higher the oxygen content in the exhaust stream, the lower the voltage signal the O2 will produce, and visa-versa. Through this information the emissions computer can determine whether to deliver more or less fuel to the combustion chambers.
Late model vehicles are equipped with two oxygen sensors, one before and one after the CAT in order to monitor oxygen content exiting the exhaust manifold and at the same time to insure the Catalytic Converter/s are functioning properly.
Heated O2 Sensor: The more recent model of the oxygen sensor is the heated oxygen sensor (H2O Sensor). An Bosch oxygen sensor's temperature must be around 650F before it will generate a voltage signal. By adding an internal heater to the oxygen sensor, voltage can be generated long before the engine has completely warmed up. Most oxygen sensors in newer cars are of this type.
Location: Oxygen sensors are always located along the exhaust path and before the tailpipe. In vehicles with only a pre-CAT O2 sensor the sensor will be located either directly before the catalytic converter or on the exhaust manifold. In vehicles with both a pre CAT and post CAT oxygen sensor, one sensor will be located directly before the CAT and the other directly after. Vehicles with dual exhaust systems can have up to four oxygen sensors monitoring exhaust streams on both sides of the engine. Dual bank and dual exhaust engines are typically V-6 or V-8 models.
For the Smog Test: Fuel delivery to an engine's combustion chambers are controlled by the vehicle's emissions computer or engine control unit (ECU) and fuel injectors. In order for an engine to pass a smog inspection, fuel delivery must be preciously controlled to produce the least emissions. If the injectors do not present adequate fuel to the combustion chambers, this causes low CO emissions and a lean fuel mixture causing high HC. In a situation where the injectors present too much fuel, this causes high CO emissions and a rich fuel mixture resulting in high HC emissions.
The main component responsible for letting the computer know how much fuel is in the exhaust system at any given moment, is the Bosch Oxygen Sensor. The Oxygen Sensor sends an electrical signal to the ECU, letting the computer determine exactly how much fuel it should continue to deliver to the combustion chambers. If for any reason the 02 sensor does not send accurate information to the computer or is lazy in sending the correct signal, the fuel delivery program will be altered.
Operation: During normal operation an oxygen sensors voltage should be switching between 0.1 to 1.0 volt at a rate of approximately 50 cycles per minute. An O2 sensor voltage above 0.45 volts is interpreted by the ECM as a rich exhaust, and an O2 sensor voltage signal below 0.45 volts as a lean exhaust.
The ECM's responsibility is to keep the oxygen sensor voltage switching between high and low voltage for optimum fuel efficiency, lowest emissions and highest miles per gallon. Usually the first sign of a damaged or defective oxygen sensor is poor fuel economy.
In Case of Failure: The average lifetime of an unheated oxygen sensor is 50,000 miles, and the heated oxygen sensor, 100,000 miles. Needless to say oxygen sensors require periodic replacement. Failure to do so will more then likely cause a smog check failure. 4 out of 10 high CO failed smog checks will be due to a defective, damaged or lazy oxygen sensor. It is probably one of the most underrated emissions components and should be payed much closer attention.
Often passing the smog inspection is a simple as installing a new oxygen sensor. We recommended an experienced auto smog or emissions repair mechanic perform the removal, installation and diagnosis of this component. And Bosch is the leading aftermarket supplier of oxygen sensors
Oxygen Sensor Codes: Avoiding The Common Pitfalls
Oxygen Sensors, otherwise referred to as O2 Sensors, and their related check engine light codes, can be troublesome at the very best! Today we discuss the design and function of these sensors, and some of the pitfalls encountered during the diagnosis of their related fault codes.
google_protectAndRun("render_ads.js::google_render_ad", google_handleError, google_render_ad);
It seems as though the check engine light and O2 Sensor codes have always gone hand in hand. I can’t even begin to tell you how many perfectly good sensors I’ve seen replaced for a rich/lean code, or as a cure to a service engine light that comes and goes. Fact is, when oxygen sensors were first being used, they did tend to fail. But manufacturers have been redesigning and tweaking these parts for over twenty years, and nowadays they are fairly bullet proof! Oxygen sensor codes no longer mean "replace the oxygen sensor", and this mindset can be costly! So what goes wrong during the diagnosis of these systems? Well, let me share my experience and you can take it for what it’s worth!Nearly all engine control systems are comprised of multiple sub-systems. These sub-systems each depend on correct input from other areas of the electronic engine control system in order to perform their individual tasks properly. Confused yet? Keep reading, it’ll make sense soon!
There are a large number of codes relating to oxygen sensor faults. There are also a lot of faults that are often incorrectly thought to be caused by a bad oxygen sensor (also referred to as an O2 Sensor). The O2 codes relating to circuit faults can be tested fairly easily. For help on these codes, check out our Generic OBDII list and definitely read our article on diagnosing the wiring related portion of a trouble code. You will also run into codes for the O2 heater circuits. Newer O2 sensors have heaters as part of their design. This allows them to get up to temperature quicker and begin functioning sooner, resulting in lower overall vehicle emissions. The codes that may give you more of a run for your money are the PO171-P0175 generic (or similar manufacturer specific) codes. These codes tell you that despite the computers attempts to correct fuel trim (the amount of time the injectors stay on, delivering more or less fuel as needed); it can not obtain the correct air/fuel ratio. These are known as rich and lean codes, and almost as often as I’ve seen new oxygen sensors installed for these codes, I’ve seen the same vehicles need re-diagnosis!
First we need to understand how an oxygen sensor works. The oxygen sensor screws into the exhaust and the sensor end protrudes into the pipe so that exhaust gases pass across the sensors internal element. There is a steel shielding with slots that direct exhaust flow across the actual element. As a note, oxygen sensors used to determine engine fuel ratios are always located in front of the catalytic converter. The sensors behind the cats are called monitors and we will discuss these later. Sensors are normally described with the prefix HO2S meaning Heated Oxygen Sensor and followed with bank and position number. For example HO2S11 would be the oxygen sensor on bank 1 and first in line (pre catalytic converter) and HO2S12 would be on bank 1, but second in line (the monitor) An oxygen sensor creates a voltage between 0 and 1 volt by means of a chemical reaction between the sensor element and the oxygen in the exhaust passing across that element. Outside air also passes through the sensor and it is a comparison between the oxygen content in the exhaust and fresh air that actually determines voltage output (information for trivial purposes only and for curious techs). Believe it or not, the fresh air on many sensors actually travels through the wiring insulation! Anyway, a voltage closer to one volt indicates a rich condition and closer to zero indicates lean. The computer uses this valve to constantly adjust fuel trim to maintain a 14.7:1 air fuel ratio. We will be putting up an article on fuel trim soon but this is a huge topic all on its own. Okay so this is where it gets somewhat complicated. Just kidding! It’s all nuts and bolts; and wires, and chemicals and never mind!
Okay so the more oxygen in the exhaust (lean condition) the lower the voltage from the O2 sensor and the more fuel the computer calls for. Then the oxygen content in the exhaust drops (because it is being used up in the combustion process), and the voltage increases (rich condition) and the process repeats, for as long as the car is running, hundreds of times a minute. A gasoline internal combustion engine needs oxygen to burn the fuel. If the mixture is ideal (or 14.7:1) then all of the oxygen is consumed as the fuel is burned. The exact amount of fuel needed to produce a 14.7:1 air/fuel ratio varies with barometric pressure (altitude), relative humidity and fuel quality and condition; thus the need for oxygen sensors.So knowing all of this what should we check when we have those pesky rich or lean codes? The most common issues for lean codes are:1. Vacuum leaks - check for failed or loose vacuum lines, leaking intake gaskets, intake air tubes loose or any other source of un-metered air leaks (leaks after the Mass Air Flow Sensor) 2. Restricted fuel filter or bent/pinched fuel system lines 3. Incorrect input from other sensors, such as the Mass Air Flow Sensor, which may not always drop a separate code 4. Engine misfire – Yes I know this one may seem weird. You might think that if there is a misfire then you will have all that unburned fuel and it should read rich; right? Well the O2 sensors read only oxygen content in the exhaust, so if you have all that unburned fuel from incomplete combustion then, you guessed it, you also have all that unburned oxygen. High O2 content in exhaust equals a lean reading!
There are also some other possibilities such as an internally leaking EGR system, (but this will typically set a separate code). A leak in the exhaust system before the O2 sensor will also cause incorrect readings. And always check for after- market modifications. These can throw a wrench into the works! The only other possibilities (however unlikely), are wiring issues, computer concerns or a bad O2 sensor! There now that I’ve said it, on to rich codes.
The possible causes of rich codes are:1. A leaking or faulty fuel injector 2. Fuel injector driver in computer shorted, or wiring short for injectors (likely a ground short) 3. Leaking or faulty fuel pressure regulator or restricted return line 4. Faulty evaporative emissions system - bleeding fuel vapors into engine (not commanded by computer) 5. On newer models a faulty fuel pump or fuel pump driver module 6. Faulty readings from other sensors such as a Mass Air Flow Sensor. You may actually be getting more air than the MAF tells the computer 7. Exhaust leaks before the sensor will cause erratic readings 8. After market components or performance chips9. And yes, if I dare say it, possibly a computer, wiring issue or even a faulty O2 sensor!
The other codes we should address are those related to the sensors located after the catalytic converter. Though these may appear identical to the oxygen sensors pre-converter, they perform an entirely different task and are known as Monitors. The only job of these sensors is to “monitor” the efficiency of the catalytic converters. The readings from these sensors should be much more stable and not fluctuating like the front O2 sensors. The computer compares the readings from the oxygen sensors (pre cats) and the monitors (post cat) to determine if the catalytic converters are doing their job and “cleaning” the exhaust. You never want to replace a monitor for a rich/lean concern as they have no bearing on these codes. As the converters begin to fail, you will see the monitors voltage readings follow the oxygen sensor readings. Technically these are all “oxygen sensors” but it is important to distinguish the difference between pre-converter & post converter sensors, so I find it easiest to stick to calling the back ones monitors.
And that pretty much wraps up my ideas on this topic. If you’ve run into other causes of these codes for gasoline engines then use the contact form and educate me! The quickest way to learn is through somebody else’s experience! Hope we helped to shed some light.
We have always used Bosch aftermarket oxygen sensors, and never had any problemns out of them.We recommend Bosch After market O2 sensors.
Bosch - The number 1 for oxygen sensors.
From the world's leading original equipment and aftermarket supplier.
As the leading developer and largest manufacturer of oxygen sensors, Bosch guarantees the use of innovative materials and production processes. Bosch oxygen sensors are patented, optimally protected against fracture and thermal shock and fully tested for proper functioning.
The outstanding features of oxygen sensors from Bosch
- Long service life
- Reliable operation
- Functionally matched to engine
An outstanding feature of all Bosch oxygen sensors is their original equipment quality. Bosch oxygen sensors are subjected to the same stringent test criteria as the original component in customer vehicles. This guarantees the consistently high quality of replacement oxygen sensors. That is why vehicle manufacturers around the world rely on oxygen sensors from Bosch – the number 1 for original equipment and aftermarket oxygen sensors.
![Reblog this post [with Zemanta]](http://img.zemanta.com/reblog_e.png?x-id=0ec855bd-5887-412a-9ac0-26c93fe3b3de)
Engine leak down test.
An internal combustion engine makes power by first drawing air and fuel into the combustion chamber. Next is the compression of the mixture and the addition of a spark. The harnessing of the resulting contained explosion is ultimately what powers the car. As an engine gets on in miles, the containment of this power can be lost due to piston ring, valve, or cylinder wall wear. Engine performance will suffer as a result. |  |
| Pressure Reading A common test of an engine's ability to compress the air-fuel mixture is called an engine compression test. A pressure gauge is connected in place of the spark plug. The engine is then cranked to create a pressure reading. A compression test is a good way to check the engine’s ability of the engine to create pressure. The gauge reads the positive pressure created by the cylinder. Loss Reading A leakdown test is a compression test in reverse. Instead of measuring the ability of the engine to create pressure, compressed air is introduced into the cylinder through the spark plug hole. One gauge on the tester measures the pressure of the air entering into the cylinder and the other measures the percentage of the air escaping—or leaking from the cylinder. The loss percentage will indicate the condition of the cylinder and overall condition of the engine. Top Dead Center Before sending air into the engine, the cylinder being tested must be placed at top dead center. The piston must be at the top of its travel. The intake and exhaust valves must be closed. When the air is compressed into the cylinder, the leakdown tester will measure any loss of air escaping past valves or piston rings. If the cylinder is not at top dead center, air escaping past an open valve will give a false reading. Reading Results No engine will have perfect sealing with zero percentage loss. Five to 10 percent loss indicates an engine in great to good running order. An engine between 10 and 20 percent can still run okay, but it’ll be time to keep an eye (or ear) on things. Above 20 percent loss and it may be time for a teardown and rebuild. Thirty percent? Major problems. The percent of leakage should also be consistent across the cylinders. Any great differences indicate a problem in that cylinder. Hearing Problems Beyond getting an overall picture of engine condition, the leakdown test is an excellent way to pinpoint where engine problems are before tearing down the engine. Listening for where the air is escaping by ear can isolate the problem. Intake Valve: Air whistling out of the intake, carburetor, or throttle body indicates leak at the intake valve. Exhaust Valve: Air heard hissing out of the tailpipe, turbocharger, or exhaust manifold means an exhaust valve leak. Piston Rings: Whistling or hissing out of the PCV valve, oil filler cap hole, or dipstick tube means the air is pushing past the rings. Suspect ring or cylinder wall wear. Head Gasket: Air bubbles in engine coolant seen at the radiator filler cap could mean air escaping into the coolant past the head gasket. Cracked Cylinder Head: Bubbles in coolant or coolant being pushed up out of the radiator neck can also indicate cracks in the cylinder head or cylinder walls.Tools and Supplies You will need a compressed air source, a leakdown gauge kit, spark plug socket, basic hand tools, vehicle service manual, and a notepad to record results.
| ||||||||||||||||||||


Monday, August 17, 2009
Shocks and struts, Tampa Florida
Serving Tampa Florida and the Metro area for over 25 years. Here in Tampa, we know how important it is to keep you vehicles shocks and struts in shape, so we have put together some pointers that will help you determine when you should replace your shocks and struts.
When should I replace my shocks and or struts
When a vehicle is brought into an auto repair shop in Tampa for routine vehicle maintenance, the auto technician may suggest that the vehicle shocks or struts need to be replaced. Learn the function of a car or trucks shocks and struts. Find out why the shocks and struts need to be replaced and how someone can tell if they’re bad.
The Purpose or Function of a Cars Shocks and Struts
Shocks and struts serve the same purpose. They’re main function is to keep the vehicle from bouncing. A vehicle has front and rear springs to cushion the vehicle over rough road conditions. If there were no shocks or struts the vehicle would continue to bounce excessively. The shocks and struts prevent the car from bouncing by damping the springs.
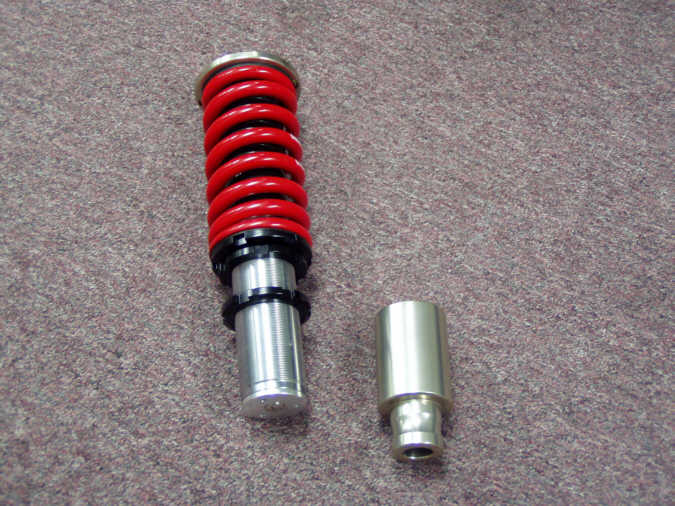
What’s the Difference Between Shocks and Struts?
Shocks are usually used to dampen leaf springs, where as a strut is used to dampen coil springs. Shocks are usually a single cylinder in the open where as a strut is normally surrounded by the coil spring and are more massive and complicated.
That’s why struts normally cost a lot more to replace than a shock. On a car the front suspension usually has struts and the rear usually has shocks. Some trucks have shocks on the front and rear. Other than those distinctions, shocks and struts serve exactly the same purpose.
Why Should the Cars Shocks or Struts be replaced?
Keeping in mind that the purpose of shocks and struts is to keep the vehicle from bouncing, the following is some of the reasons why they should be replaced.
* An excessively bouncing car can be an uncomfortable driving experience.
* The vehicle can be harder to control leading to an unsafe condition.
* Excessive strain can be put on other vehicle components causing premature failure.
* Bad shocks or struts will cause the tires to bounce and create spotty or choppy wear on the vehicles tires.
How to Tell if a Cars Shocks or Struts are Bad
1. Shocks and struts can be oil or air filled. If they are leaking oil or air they need to be replaced. Consumer beware, some dishonest auto repair shops will squirt oil on the shocks, show the customer the leaky shocks and tell them they need to be replaced.
2. Another method is the bounce test. Put all your weight on the front or rear of the vehicle and push down on the vehicle. Let go of the vehicle and stand back to see of it bounces. If the vehicle comes back up without bouncing, the shocks are probably in good shape. If the vehicle bounces a few times, chances are the shocks or struts need to be replaced.
Shocks and struts are wear items, not maintenance items. There’s no set mileage or time limit when they should be replaced. If the tires seem to have a choppy wear pattern or the vehicle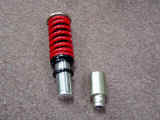 bounces excessively over bumps, the shocks need to be checked.
Look at the struts or shocks and see if they’re leaking. Perform the bounce test and see if the vehicle bounces. Replacing the vehicle shocks and struts when they’re bad will create a safer and more comfortable driving experience, not to mention saving money in the long run. And we know how important it is in tampa Florida to keep your shocks and struts in good shape. There are numerous shops in Tampa Florida to help you with all of your shock and strut replacement, but always beware of the shops that will try to overcharge for services. even here in Tampa there are shops that can be a little pricey. Please go here to determine what shop will best suit your needs
When should I replace my shocks and or struts
When a vehicle is brought into an auto repair shop in Tampa for routine vehicle maintenance, the auto technician may suggest that the vehicle shocks or struts need to be replaced. Learn the function of a car or trucks shocks and struts. Find out why the shocks and struts need to be replaced and how someone can tell if they’re bad.
The Purpose or Function of a Cars Shocks and Struts
Shocks and struts serve the same purpose. They’re main function is to keep the vehicle from bouncing. A vehicle has front and rear springs to cushion the vehicle over rough road conditions. If there were no shocks or struts the vehicle would continue to bounce excessively. The shocks and struts prevent the car from bouncing by damping the springs.
What’s the Difference Between Shocks and Struts?
Shocks are usually used to dampen leaf springs, where as a strut is used to dampen coil springs. Shocks are usually a single cylinder in the open where as a strut is normally surrounded by the coil spring and are more massive and complicated.
That’s why struts normally cost a lot more to replace than a shock. On a car the front suspension usually has struts and the rear usually has shocks. Some trucks have shocks on the front and rear. Other than those distinctions, shocks and struts serve exactly the same purpose.
Why Should the Cars Shocks or Struts be replaced?
Keeping in mind that the purpose of shocks and struts is to keep the vehicle from bouncing, the following is some of the reasons why they should be replaced.
* An excessively bouncing car can be an uncomfortable driving experience.
* The vehicle can be harder to control leading to an unsafe condition.
* Excessive strain can be put on other vehicle components causing premature failure.
* Bad shocks or struts will cause the tires to bounce and create spotty or choppy wear on the vehicles tires.
How to Tell if a Cars Shocks or Struts are Bad
1. Shocks and struts can be oil or air filled. If they are leaking oil or air they need to be replaced. Consumer beware, some dishonest auto repair shops will squirt oil on the shocks, show the customer the leaky shocks and tell them they need to be replaced.
2. Another method is the bounce test. Put all your weight on the front or rear of the vehicle and push down on the vehicle. Let go of the vehicle and stand back to see of it bounces. If the vehicle comes back up without bouncing, the shocks are probably in good shape. If the vehicle bounces a few times, chances are the shocks or struts need to be replaced.
Shocks and struts are wear items, not maintenance items. There’s no set mileage or time limit when they should be replaced. If the tires seem to have a choppy wear pattern or the vehicle
bounces excessively over bumps, the shocks need to be checked.Look at the struts or shocks and see if they’re leaking. Perform the bounce test and see if the vehicle bounces. Replacing the vehicle shocks and struts when they’re bad will create a safer and more comfortable driving experience, not to mention saving money in the long run. And we know how important it is in tampa Florida to keep your shocks and struts in good shape. There are numerous shops in Tampa Florida to help you with all of your shock and strut replacement, but always beware of the shops that will try to overcharge for services. even here in Tampa there are shops that can be a little pricey. Please go here to determine what shop will best suit your needs
How do I choose the right automotive repair shop
Choosing the right automotive service repair shop.
Most people just arent familiar enough about the inner workings of their vehicles to determine whether an auto repair facility is honest and charges fair prices. Fortunately, there are a number of recommendations that will help provide assurance that an auto repair shop is both competent and honest.
In the first place, dont choose a shop simply because its location is convenient. Youre just gamblingand you may be a big loser. The National Automotive Parts Association (NAPA) recommends that you find a reputable repair shop before you need repairs. You can make better decisions when youre not rushed or needing repairs immediately.
When you first contact the shop, ask about its experience with your particular vehicle make and model and whether they specialize in certain types of repairs. Dont hesitate to ask the shop for a few references. Any facility that wants your business should be happy to provide them. A few minutes on the phone contacting references could save you a lot of grief later. Also, ask family, friends, neighbors, and co-workers to recommend shops they have used that do good work at fair prices.
You can also check with your local Better Business Bureau or Department of Consumer Affairs to see if there have been complaints against the repair shop youre considering. You may also inquire if an independently owned and operated shop is affiliated with NAPA. To be certified as a NAPA Auto Care Center, the shop must have gained a reputation for service quality in its community.
When visiting the shop, notice whether there are vehicles being repaired or in the parking lot equal in value to yours. Is the facility neat and well organized? Does it have modern equipment? Is the staff courteous and helpful?
All policies (labor rates, guarantees, methods of payment, etc.) should be posted and/or explained to your satisfaction. Also, find out if the facility offers a written guarantee on parts and labor as well as a customer satisfaction policy.
Some garages promote free inspections, but this is usually not to your benefit. The shop must recover the cost of the time it spends on the inspection in some way, and that usually results in trying to sell you repairs--whether you need them or not. According to NAPA, All reputable auto care centers charge a nominal fee for basic inspections.
NAPA advises against basing your choice of facility on price alone. Youre paying not just for parts and labor but also for the expertise of the mechanics. Around the shop look for signs that it has the equipment and skilled technicians required to make the needed repairs. Look for the ASE symbol, a national standard of technician competencewhich is prominently displayed at certified facilities. ASE-certified technicians must be trained and tested to achieve certification in a variety of repair specialties, and must be re-tested every five years to maintain certification. The display of trade school diplomas and certificates of advanced course work from car manufacturers can also identify qualified technicians. Since it is the technicians themselves, who are personally certified, not the shop, you may want to be assured that a certified person will do the repairs on your vehicle.
Discuss beforehand what parts will be used to repair your vehicle. Brand name parts are typically engineered to original manufacturers quality or better, and they often carry product warranties. However, remanufactured parts and non-brand name parts often cost less and may also carry warranties. Discuss with the shop the pros and cons of which parts to use.
Misunderstandings often occur due to poor communication between the customer and the shop. Its easy to become intimidated when communicating with a car repair shop and youre hearing a lot of words and concepts you dont understand. A hallmark of a good facility is the ability to communicate to you what is wrong with your vehicle and what your options are for fixing the problem. Dont be afraid to ask questions until youre sure you understand to your satisfaction everything that will be repaired and what it will cost. Equally important is to give the shop a full description of the problem. If the vehicle is making a funny noise, try to convey exactly when it happens. Does it occur when the engine is hot or when it is cold? when turning right or left? when braking or accelerating? with the lights on or off? on a full or empty fuel tank? For some problems, the best way to communicate may be to take the service writer or technician for a road test so they can see the exact conditions in which the problem occurs. The point is to do your part to help the mechanic accurately diagnose and repair the problem.
These days with the average cost of a new vehicle exceeding $23,000, people drive their cars longer. Basic automobile maintenance and good repair service is the best way to keep your car running well for many years.Choosing the right automotive repair shop is crucial to your car and to your wallet.
Shocka snd struts, Orlando Florida
Serving Orlando Florida and the Metro area for over 25 years. Here in Orlando, we know how important it is to keep you vehicles shocks and struts in shape, so we have put together some pointers that will help you determine when you should replace your shocks and struts.
When should I replace my shocks and or struts
When a vehicle is brought into an auto repair shop in Orlando for routine vehicle maintenance, the auto technician may suggest that the vehicle shocks or struts need to be replaced. Learn the function of a car or trucks shocks and struts. Find out why the shocks and struts need to be replaced and how someone can tell if they’re bad.
The Purpose or Function of a Cars Shocks and Struts
Shocks and struts serve the same purpose. They’re main function is to keep the vehicle from bouncing. A vehicle has front and rear springs to cushion the vehicle over rough road conditions. If there were no shocks or struts the vehicle would continue to bounce excessively. The shocks and struts prevent the car from bouncing by damping the springs.
What’s the Difference Between Shocks and Struts?
Shocks are usually used to dampen leaf springs, where as a strut is used to dampen coil springs. Shocks are usually a single cylinder in the open where as a strut is normally surrounded by the coil spring and are more massive and complicated.
That’s why struts normally cost a lot more to replace than a shock. On a car the front suspension usually has struts and the rear usually has shocks. Some trucks have shocks on the front and rear. Other than those distinctions, shocks and struts serve exactly the same purpose.
Why Should the Cars Shocks or Struts be replaced?
Keeping in mind that the purpose of shocks and struts is to keep the vehicle from bouncing, the following is some of the reasons why they should be replaced.
* An excessively bouncing car can be an uncomfortable driving experience.
* The vehicle can be harder to control leading to an unsafe condition.
* Excessive strain can be put on other vehicle components causing premature failure.
* Bad shocks or struts will cause the tires to bounce and create spotty or choppy wear on the vehicles tires.
How to Tell if a Cars Shocks or Struts are Bad
1. Shocks and struts can be oil or air filled. If they are leaking oil or air they need to be replaced. Consumer beware, some dishonest auto repair shops will squirt oil on the shocks, show the customer the leaky shocks and tell them they need to be replaced.
2. Another method is the bounce test. Put all your weight on the front or rear of the vehicle and push down on the vehicle. Let go of the vehicle and stand back to see of it bounces. If the vehicle comes back up without bouncing, the shocks are probably in good shape. If the vehicle bounces a few times, chances are the shocks or struts need to be replaced.
Shocks and struts are wear items, not maintenance items. There’s no set mileage or time limit when they should be replaced. If the tires seem to have a choppy wear pattern or the vehiclebounces excessively over bumps, the shocks need to be checked.
Look at the struts or shocks and see if they’re leaking. Perform the bounce test and see if the vehicle bounces. Replacing the vehicle shocks and struts when they’re bad will create a safer and more comfortable driving experience, not to mention saving money in the long run. And we know how important it is in Orlando Florida to keep your shocks and struts in good shape. There are numerous shops in Orlando Florida to help you with all of your shock and strut replacement, but always beware of the shops that will try to overcharge for services. even here in Orlando there are shops that can be a little pricey. Please go here to determine what shop will best suit your needs
When should I replace my shocks and or struts
When a vehicle is brought into an auto repair shop in Orlando for routine vehicle maintenance, the auto technician may suggest that the vehicle shocks or struts need to be replaced. Learn the function of a car or trucks shocks and struts. Find out why the shocks and struts need to be replaced and how someone can tell if they’re bad.
The Purpose or Function of a Cars Shocks and Struts
Shocks and struts serve the same purpose. They’re main function is to keep the vehicle from bouncing. A vehicle has front and rear springs to cushion the vehicle over rough road conditions. If there were no shocks or struts the vehicle would continue to bounce excessively. The shocks and struts prevent the car from bouncing by damping the springs.
What’s the Difference Between Shocks and Struts?
Shocks are usually used to dampen leaf springs, where as a strut is used to dampen coil springs. Shocks are usually a single cylinder in the open where as a strut is normally surrounded by the coil spring and are more massive and complicated.
That’s why struts normally cost a lot more to replace than a shock. On a car the front suspension usually has struts and the rear usually has shocks. Some trucks have shocks on the front and rear. Other than those distinctions, shocks and struts serve exactly the same purpose.
Why Should the Cars Shocks or Struts be replaced?
Keeping in mind that the purpose of shocks and struts is to keep the vehicle from bouncing, the following is some of the reasons why they should be replaced.
* An excessively bouncing car can be an uncomfortable driving experience.
* The vehicle can be harder to control leading to an unsafe condition.
* Excessive strain can be put on other vehicle components causing premature failure.
* Bad shocks or struts will cause the tires to bounce and create spotty or choppy wear on the vehicles tires.
How to Tell if a Cars Shocks or Struts are Bad
1. Shocks and struts can be oil or air filled. If they are leaking oil or air they need to be replaced. Consumer beware, some dishonest auto repair shops will squirt oil on the shocks, show the customer the leaky shocks and tell them they need to be replaced.
2. Another method is the bounce test. Put all your weight on the front or rear of the vehicle and push down on the vehicle. Let go of the vehicle and stand back to see of it bounces. If the vehicle comes back up without bouncing, the shocks are probably in good shape. If the vehicle bounces a few times, chances are the shocks or struts need to be replaced.
Shocks and struts are wear items, not maintenance items. There’s no set mileage or time limit when they should be replaced. If the tires seem to have a choppy wear pattern or the vehicle
 bounces excessively over bumps, the shocks need to be checked.
Look at the struts or shocks and see if they’re leaking. Perform the bounce test and see if the vehicle bounces. Replacing the vehicle shocks and struts when they’re bad will create a safer and more comfortable driving experience, not to mention saving money in the long run. And we know how important it is in Orlando Florida to keep your shocks and struts in good shape. There are numerous shops in Orlando Florida to help you with all of your shock and strut replacement, but always beware of the shops that will try to overcharge for services. even here in Orlando there are shops that can be a little pricey. Please go here to determine what shop will best suit your needs
Miami shocks and struts, when should they be replaced
Serving Miami Florida and the Metro area for over 25 years. Here in Miami, we know how important it is to keep you vehicles shocks and struts in shape, so we have put together some pointers that will help you determine when you should replace your shocks and struts.
When should I replace my shocks and or struts
When a vehicle is brought into an auto repair shop in Miami for routine vehicle maintenance, the auto technician may suggest that the vehicle shocks or struts need to be replaced. Learn the function of a car or trucks shocks and struts. Find out why the shocks and struts need to be replaced and how someone can tell if they’re bad.
The Purpose or Function of a Cars Shocks and Struts
Shocks and struts serve the same purpose. They’re main function is to keep the vehicle from bouncing. A vehicle has front and rear springs to cushion the vehicle over rough road conditions. If there were no shocks or struts the vehicle would continue to bounce excessively. The shocks and struts prevent the car from bouncing by damping the springs.
What’s the Difference Between Shocks and Struts?
Shocks are usually used to dampen leaf springs, where as a strut is used to dampen coil springs. Shocks are usually a single cylinder in the open where as a strut is normally surrounded by the coil spring and are more massive and complicated.
That’s why struts normally cost a lot more to replace than a shock. On a car the front suspension usually has struts and the rear usually has shocks. Some trucks have shocks on the front and rear. Other than those distinctions, shocks and struts serve exactly the same purpose.
Why Should the Cars Shocks or Struts be replaced?
Keeping in mind that the purpose of shocks and struts is to keep the vehicle from bouncing, the following is some of the reasons why they should be replaced.
* An excessively bouncing car can be an uncomfortable driving experience.
* The vehicle can be harder to control leading to an unsafe condition.
* Excessive strain can be put on other vehicle components causing premature failure.
* Bad shocks or struts will cause the tires to bounce and create spotty or choppy wear on the vehicles tires.
How to Tell if a Cars Shocks or Struts are Bad
1. Shocks and struts can be oil or air filled. If they are leaking oil or air they need to be replaced. Consumer beware, some dishonest auto repair shops will squirt oil on the shocks, show the customer the leaky shocks and tell them they need to be replaced.
2. Another method is the bounce test. Put all your weight on the front or rear of the vehicle and push down on the vehicle. Let go of the vehicle and stand back to see of it bounces. If the vehicle comes back up without bouncing, the shocks are probably in good shape. If the vehicle bounces a few times, chances are the shocks or struts need to be replaced.
Shocks and struts are wear items, not maintenance items. There’s no set mileage or time limit when they should be replaced. If the tires seem to have a choppy wear pattern or the vehicle
bounces excessively over bumps, the shocks need to be checked.
Look at the struts or shocks and see if they’re leaking. Perform the bounce test and see if the vehicle bounces. Replacing the vehicle shocks and struts when they’re bad will create a safer and more comfortable driving experience, not to mention saving money in the long run. And we know how important it is in Miami Florida to keep your shocks and struts in good shape.
When should I replace my shocks and or struts
When a vehicle is brought into an auto repair shop in Miami for routine vehicle maintenance, the auto technician may suggest that the vehicle shocks or struts need to be replaced. Learn the function of a car or trucks shocks and struts. Find out why the shocks and struts need to be replaced and how someone can tell if they’re bad.
The Purpose or Function of a Cars Shocks and Struts
Shocks and struts serve the same purpose. They’re main function is to keep the vehicle from bouncing. A vehicle has front and rear springs to cushion the vehicle over rough road conditions. If there were no shocks or struts the vehicle would continue to bounce excessively. The shocks and struts prevent the car from bouncing by damping the springs.
What’s the Difference Between Shocks and Struts?
Shocks are usually used to dampen leaf springs, where as a strut is used to dampen coil springs. Shocks are usually a single cylinder in the open where as a strut is normally surrounded by the coil spring and are more massive and complicated.
That’s why struts normally cost a lot more to replace than a shock. On a car the front suspension usually has struts and the rear usually has shocks. Some trucks have shocks on the front and rear. Other than those distinctions, shocks and struts serve exactly the same purpose.
Why Should the Cars Shocks or Struts be replaced?
Keeping in mind that the purpose of shocks and struts is to keep the vehicle from bouncing, the following is some of the reasons why they should be replaced.
* An excessively bouncing car can be an uncomfortable driving experience.
* The vehicle can be harder to control leading to an unsafe condition.
* Excessive strain can be put on other vehicle components causing premature failure.
* Bad shocks or struts will cause the tires to bounce and create spotty or choppy wear on the vehicles tires.
How to Tell if a Cars Shocks or Struts are Bad
1. Shocks and struts can be oil or air filled. If they are leaking oil or air they need to be replaced. Consumer beware, some dishonest auto repair shops will squirt oil on the shocks, show the customer the leaky shocks and tell them they need to be replaced.
2. Another method is the bounce test. Put all your weight on the front or rear of the vehicle and push down on the vehicle. Let go of the vehicle and stand back to see of it bounces. If the vehicle comes back up without bouncing, the shocks are probably in good shape. If the vehicle bounces a few times, chances are the shocks or struts need to be replaced.
Shocks and struts are wear items, not maintenance items. There’s no set mileage or time limit when they should be replaced. If the tires seem to have a choppy wear pattern or the vehicle Look at the struts or shocks and see if they’re leaking. Perform the bounce test and see if the vehicle bounces. Replacing the vehicle shocks and struts when they’re bad will create a safer and more comfortable driving experience, not to mention saving money in the long run. And we know how important it is in Miami Florida to keep your shocks and struts in good shape.
Tuesday, August 4, 2009
Radiator Flush – Antifreeze Replacement Coolant Flush or Replacing the Engine Coolant?
First it should be noted that coolant and antifreeze are the same thing. Replacing the vehicles engine coolant is part of a routine vehicle maintenance regiment, but how often should the coolant be replaced? Many auto shops will recommend a flush instead of a straight coolant replacement. What’s better for the vehicle, replacing the coolant or flushing the radiator? Find out the answer to the question, radiator flush or engine coolant replacement.
How Often Should the Engine Coolant Be Replaced?
The best answer to the question of how often engine coolant should be replaced is to find out what the vehicle manufacturer recommends. The vehicles owner’s manual should have a maintenance schedule that shows what mileage intervals the engine coolant should be replaced. If the vehicles owner’s manual is missing, the dealer or the manufacturers website should have the needed information.
Older vehicles usually require that the engine/radiator coolant be replaced every 30,000 miles. Most new vehicles from 2003 and up have a gold coolant (older vehicles green coolant) that should last up to 100,000 miles. The manufacturers maintenance schedule will have the mileage intervals required. It’s important to note that most manufacturers do not recommend a coolant flush but simply recommend replacing the engine coolant.
Drain and Refill Radiator Coolant or Cooling System Flush
Drain and Refill
- With a radiator coolant drain and refill the coolant is simply drained from the radiator and refilled. Most radiators have a drain on the bottom of the radiator called a petcock. The petcock is simply turned and the coolant will drain from the petcock. If there is no petcock, the bottom radiator hose can be removed to drain the coolant.
- After the radiator is drained, close the petcock and refill the radiator, usually with a mixture of half water and half coolant. Auto parts stores usually have straight coolant or containers that are premixed with water. Make sure the correct coolant is used to refill the radiator. If the vehicle is equipped with a coolant recovery tank, make sure the tank is at the level indicated on the tank.
Cooling System Flush
When the vehicles radiator is drained, most of the coolant in the engine remains. With a cooling system flush auto shops will either manually flush the cooling system or use a flush machine.
- Manual Flush – When the cooling system is flushed manually, a flush solution is poured into the radiator. The cars engine is then ran until it reaches operating temperature. This allows the thermostat to open and coolant to run through the entire cooling system. The radiator is then drained and refilled with coolant. Old coolant will still remain in the engine.
- Coolant Flush Machine – With a flush machine the coolant is forced through the cooling system and virtually all of the old coolant is removed from the cooling system. With a simple drain and refill a lot of rust and other contaminants remain in the engine. With a manual flush more contaminants are removed but some still remain.
Other Chemicals Used With a Cooling System Flush
Naturally a flush cleaning agent should be used when a coolant flush is performed. Some other chemicals that might be used may included the following:
- Chemical Flush – Cleans the cooling systems and removes rust, other contaminants and deposits
- Lubrication – Sometimes auto repair shops will use a lubricant that lubricates the water pump and other components to help increase the life of those components.
- Sealants - Some experts say that a cooling system flush may break loose contaminants that may cause leaks. As a precaution they may add sealants that will actually work to seal leaks before they occur.
Whatever choice is made between a drain and refill or a flush, there are some experts that claim that a flush machine may cause more damage by breaking loose components. If a cooling system flush is performed, it’s best to make sure that there is a guarantee or warranty against future problems like coolant leaks. Most repair orders that are signed by the vehicle owner at the auto repair shop state that no expressed warranties apply. If there is a warranty, make sure that the warranty is in writing.
Where should i take my car to get the oil changed
Performing routine maintenance on a car or truck is important to keep the vehicle running at its peak performance, however no maintenance routine is more important than changing the vehicles engine oil and filter. Premature engine failure due to lack of changing a car or truck’s engine oil could potential cost thousands of dollars in engine repairs. It may be a bit of a surprise as to what’s the best option for an oil change, the dealership, and independent fast lube facility or simply doing it yourself.
The Dealer
Most people perceive the local dealership as being to expensive to change their car or truck’s engine oil. Although some repairs may be more expensive at the dealership, oil changes may be an exception to the rule. Most dealerships understand that customers visit a service facility more often for oil changes than for any other reason. Since most dealers want consumers to visit their dealership more often, they will often price an oil change service at a very competitive price to get them coming back.
The dealer also knows the vehicle best. They know what’s the best oil and filter for the vehicle. On the down side, dealerships tend to be much slower than facilities that specialize in oil changes like fast lube facilities. Since dealers do a variety of repairs, they are often not geared to getting vehicles in and out in a timely manner.
Dealership Pros
- They normally give you the correct weight and API rated oil.
- Price competitive.
- Oil change can be performed in conjunction with other (warranty) repairs.
- Oil change will adhere to manufacturer’s guidelines for warranty requirements.
- Most dealers perform a comprehensive inspection report.
- Vehicle history recording and recall awareness.
* Potentially longer waits on the service drive for vehicle to be written up.
The Independent Fast Lube Facility
It seems that there’s a fast lube facility on every corner these days, so an independent facility is probably much closer than a dealer. Independents also strive to get a vehicle in and out in a timely manner. Their facilities and processes are geared and focused towards a fast service, which customers certainly appreciate. A word of caution; make sure that the oil they use is what the manufacturer requires as far as oil weight as well as the oil’s API rating. The correct oil specifications can be found in the vehicles owner’s manual. Just as important, insure that the oil filter meets or exceeds the vehicle manufacturers recommendations.
Independent Pros
* Price competitive
* Length of time to complete oil change
* Length of time it takes for vehicle write-up.
* Location
Independent Cons
* Oil and filter may not be specific to vehicle requirementsInability to perform other needed repairs/services
* The Do-It-Yourself Method
Do-It-Yourself
Changing your own oil and filter helps to insure the job’s done correctly, but it can be a real hassle. Getting rid of the waste oil and filter can be a problem. The waste oil can be taken to certain auto parts stores or other oil change facilities. Crawling under a vehicle is also pretty uncomfortable. Using a car jack makes the job more comfortable, but safety can be an issue if the car jack fails.
Since dealerships and independent fast lube facilities buy oil in bulk, the oil is much cheaper. Buying oil by the quart can cost more than what an oil change facility actually charges.
Do-It-Yourself Pros
* Better choice for oil and filter.
* Performing the oil change at your convenience.
* Reassurance of work performed to your satisfaction
Do-It-Yourself Cons
* Simply doing the work yourself
* Not saving much, in some cases could be more expensive
* Vehicle records/history
Summary
If cost is an issue, it’s best to shop around. The dealer price may be surprisingly low. Be careful using a coupon. Read the fine print, the amount of oil is often limited. Hazardous waste and taxes are usually extra. The type of oil is often listed on the coupon; make sure the vehicle manufacturer recommends the oil listed on coupon.
If time is an issue, the independent is probably your best bet. Some people like the idea of all the vehicles history being recorded at the dealership. There are certainly many factors to consider when deciding on where to get you oil change.
Vehicle maintenance, schedule, recommendations
Asking several car service facilities the question of what services should be performed on a particular vehicle, will probably heed several different answers. Vehicle service shops are in the business to make money, the more services they recommend the more profits they can make.
When reviewing the manufacturers scheduled maintenance, keep in mind that the routine services listed are the bare minimum that should be performed. If the vehicle is driven in a lot of stop and go traffic or in harsh driving conditions like off-road, some maintenance services may need to be performed more often.
How Often Should Maintenance be Performed?
The maintenance schedule shows at what miles a particular service should be performed. It may also list a time frame that a particular service should be performed. For example it may show an oil change to be performed at 5,000 miles or every 6 months.
If a vehicle isn’t driven much, has less than 5,000 miles since the last service and it’s been over 6 months since the last oil change, an oil changed should be performed. It’s basically whatever comes first, time or mileage.
Types of Maintenance Services
There are all types of routine maintenance services that must be performed. The different type of services various widely from on vehicle to another. The major services are usually performed at 30,000 miles intervals, but this can also vary widely depending on the vehicle. The newer vehicle models coming out in recent years require less and less services than previous vehicles.
Many newer models don’t require coolant change or transmission service for 100,000 miles. Here a few typical routine maintenance services:
* Engine oil and filter change
* Tire rotation
* Chassis lube
* Air filter change
* Cabin filter change (if equipped)
* Fuel filter replacement
* Coolant replacement
* Transmission service
* Axle service
* Battery service
* Timing belt
The one service that’s usually required the most is an engine oil and filter change. Normally every time a vehicle is scheduled for service an oil change is performed. The service facility should also perform a comprehensive inspection of the vehicle and recommend any other repairs that may be needed.
Tires and Brakes – Wear Items
Tires and brakes are considered wear items and are not routine maintenance services. When a vehicle is brought in for routine maintenance, the tires and brakes are important safety wear items that should be checked and replaced if necessary. Wiper blades, alignments, coolant hoses and engine drive belts are also some examples of wear items that should be checked every time a vehicle’s brought in for service.
If brakes are neglected, the brake pads could cut into the brake rotors and the rotors may need to be replaced, adding additional expense to the repair. Wore out brakes and tires will also impeded the vehicles ability to stop efficiently. Besides worn out tires affecting braking, worn tires will also reduce the vehicles handling abilities while corning, especially in wet weather.
Before the Vehicle is Serviced
Before the vehicle is taken to a service facility, the maintenance schedule should be reviewed. Some dishonest service facilities may suggest a service and claim the manufacturer recommends it. Knowing what maintenance should be performed will help let the car owner know if their service facility is on the up and up
If the honesty of the service shop is in question, where’s the best place to find out what services should be performed on the vehicle?
Manufacturers Scheduled Maintenance
The best source of information about scheduled maintenance is from the vehicle manufacturer. The owner’s portfolio that came with the vehicle when it was new should include a scheduled maintenance booklet that may be incorporated in with the owner’s manual or it may be a separate booklet.
If the maintenance schedule booklet cannot be found, most manufacturers will have that information on their website. Simply do a search for the manufacturer on the Internet. When the manufacturer’s site is located, look for a tab for owner information and the maintenance schedule should be found there.
Many manufacturers also allow owners to set up an account for a particular vehicle on their web page. The vehicle owner can keep track of their performed services and they will alert the owner when routine services are needed. The manufacturer will also notify car owners of any pending recalls through their website.
The Minimum Maintenance RequiredWhen reviewing the manufacturers scheduled maintenance, keep in mind that the routine services listed are the bare minimum that should be performed. If the vehicle is driven in a lot of stop and go traffic or in harsh driving conditions like off-road, some maintenance services may need to be performed more often.
How Often Should Maintenance be Performed?
The maintenance schedule shows at what miles a particular service should be performed. It may also list a time frame that a particular service should be performed. For example it may show an oil change to be performed at 5,000 miles or every 6 months.
If a vehicle isn’t driven much, has less than 5,000 miles since the last service and it’s been over 6 months since the last oil change, an oil changed should be performed. It’s basically whatever comes first, time or mileage.
Types of Maintenance Services
There are all types of routine maintenance services that must be performed. The different type of services various widely from on vehicle to another. The major services are usually performed at 30,000 miles intervals, but this can also vary widely depending on the vehicle. The newer vehicle models coming out in recent years require less and less services than previous vehicles.
Many newer models don’t require coolant change or transmission service for 100,000 miles. Here a few typical routine maintenance services:
* Engine oil and filter change
* Tire rotation
* Chassis lube
* Air filter change
* Cabin filter change (if equipped)
* Fuel filter replacement
* Coolant replacement
* Transmission service
* Axle service
* Battery service
* Timing belt
The one service that’s usually required the most is an engine oil and filter change. Normally every time a vehicle is scheduled for service an oil change is performed. The service facility should also perform a comprehensive inspection of the vehicle and recommend any other repairs that may be needed.
Tires and Brakes – Wear Items
Tires and brakes are considered wear items and are not routine maintenance services. When a vehicle is brought in for routine maintenance, the tires and brakes are important safety wear items that should be checked and replaced if necessary. Wiper blades, alignments, coolant hoses and engine drive belts are also some examples of wear items that should be checked every time a vehicle’s brought in for service.
If brakes are neglected, the brake pads could cut into the brake rotors and the rotors may need to be replaced, adding additional expense to the repair. Wore out brakes and tires will also impeded the vehicles ability to stop efficiently. Besides worn out tires affecting braking, worn tires will also reduce the vehicles handling abilities while corning, especially in wet weather.
Before the Vehicle is Serviced
Before the vehicle is taken to a service facility, the maintenance schedule should be reviewed. Some dishonest service facilities may suggest a service and claim the manufacturer recommends it. Knowing what maintenance should be performed will help let the car owner know if their service facility is on the up and up
Subscribe to:
Posts (Atom)